
This post may contain affiliate links. Please read our disclosure policy.


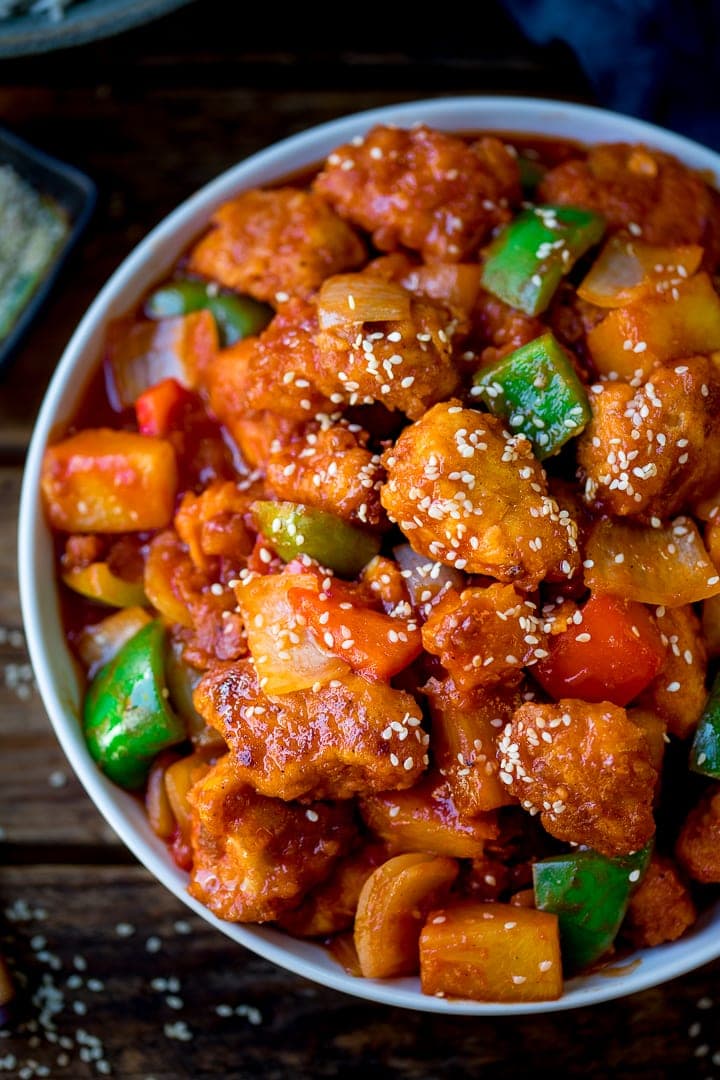
This Sweet and Sour Chicken has been one of our reader favourites for years!
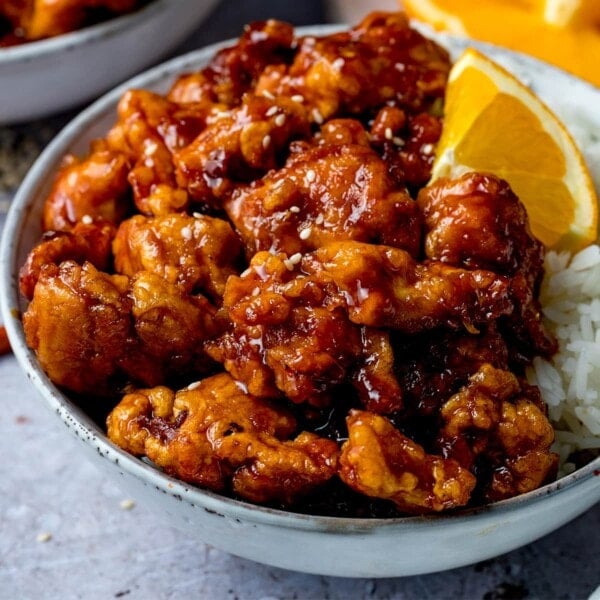
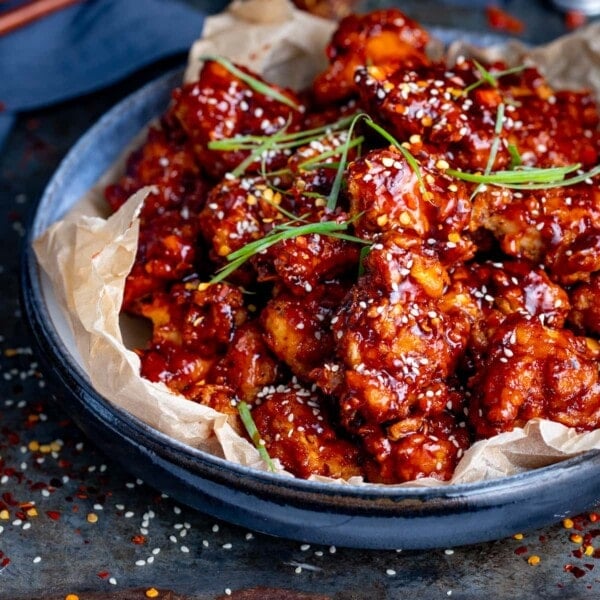
We’ve got crispy yet juicy chicken with a tangy sauce that’s perfectly balanced with just the right amount of sweetness. Want to know the secret to that irresistible crispy coating and the sauce that will have everyone asking for seconds? This is my homemade crispy sweet and sour chicken with a sweet and tangy sauce made from scratch using store cupboard ingredients!
“Absolutely gorgeous, amazingly tasty, sweet and tangy.
I’ve always steared clear of sweet-and-sour dishes from Chinese restaurants or takeaways because I didn’t think I’d like the sweet and savoury together and also because of the MSG the majority of Chinese chef’s use. Just goes to show that it’s not required if recipes use plentiful seasoning and the right ingredients. Try this, you will ‘not’ be disappointed!”
Nicky’s Notes

This Sweet and Sour Chicken has been a Kitchen Sanctuary favourite for years, and I completely understand why, it’s got that proper takeaway-style feel, but with a homemade sauce that tastes fresher, richer and much more balanced.
The sauce is one of those slightly odd combinations that just works. Ketchup, malt vinegar, dark brown sugar and tinned pineapple might not sound fancy, but together they give you that glossy, tangy-sweet sauce we all know and love, without the almost-neon orange glow you sometimes get from a takeaway.
I also wanted the chicken coating to do more than just add crunch. The seasoned flour, garlic salt and paprika give the chicken flavour before it even hits the sauce, so you get lovely crispy, juicy little pieces that are tasty enough to pinch straight from the bowl. Not that I’d ever do that, obviously… 😋
I’ve tested this with fresh pineapple and tinned pineapple, and tinned wins for me here. The juice is really important for the sauce, and the pineapple chunks hold up beautifully when everything is tossed together.
Table of Contents
🧾 Ingredients for Sweet & Sour Chicken
What ingredients give you that sweet and sour chicken with tangy, sweet and well, sour flavour?
The sauce is actually quite a bizarre combination:
- Ketchup – and plenty of it – for a tanginess and colour. I don’t eat a lot of ketchup, but it’s a must for this dish.
- Malt vinegar – it’s the best type of vinegar I’ve found for getting the ‘right’ touch of sourness.
- Brown sugar – for rounded sweetness, and to counteract any bitterness in the vinegar.
- Pineapple chunks in pineapple juice – yep, rather than chopping up a fresh pineapple, I find pineapple chunks actually work better, and the juice is an all-important element to the sweet–tangy flavour of the sauce.
And of course we’re doing this sweet and sour chicken Hong Kong style – which means the chicken is chopped into bite-sized pieces, dredged in a flavourful coating then fried to crisp perfection, before being coated in that sweet and sour sauce.
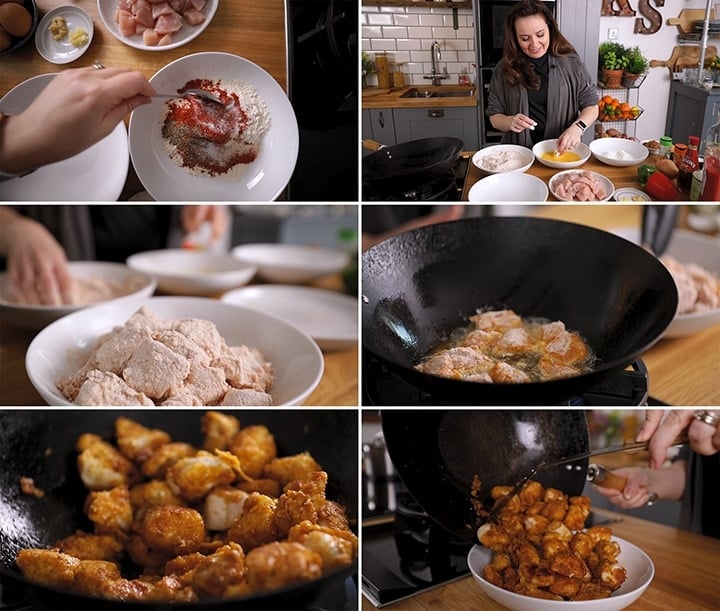
👩🍳 How to make the Crispy Chicken
***Full recipe with detailed steps in the recipe card at the end of this post***
We start by coating the chicken in cornflour (cornstarch), then egg and then seasoned flour. Then fry in oil until crispy. You can do this in two batches if your pan is on the small side. I can just about do it in one batch in my wok. Then remove the crispy chicken from the wok.
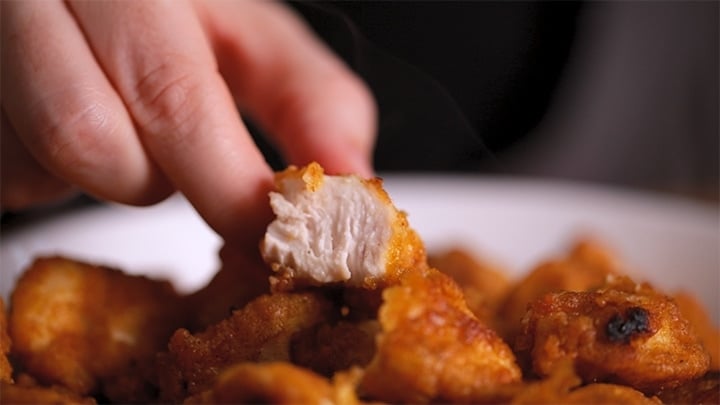
Pro Tip
Check the chicken is fully cooked: You want to ensure the chicken is fully cooked before serving. Slice open one of the larger pieces you can find, and make sure it’s no longer pink in the middle. If it’s white with no pink areas, it’s cooked
👩🍳 How to make the Sweet & Sour Sauce
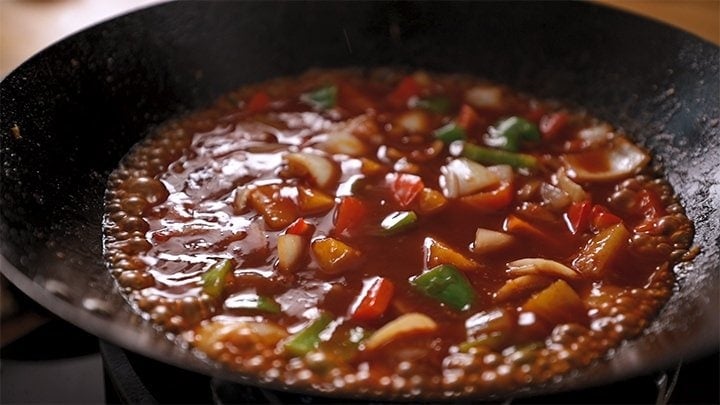
Now onto the sweet and sour sauce. We fry onions and bell peppers in a wok until very lightly softened (just a couple of minutes), then add garlic and ginger, followed by those all-important bizarre ingredients: ketchup, malt vinegar, brown sugar and tinned pineapple (including the juice). Bring it to a gentle boil.
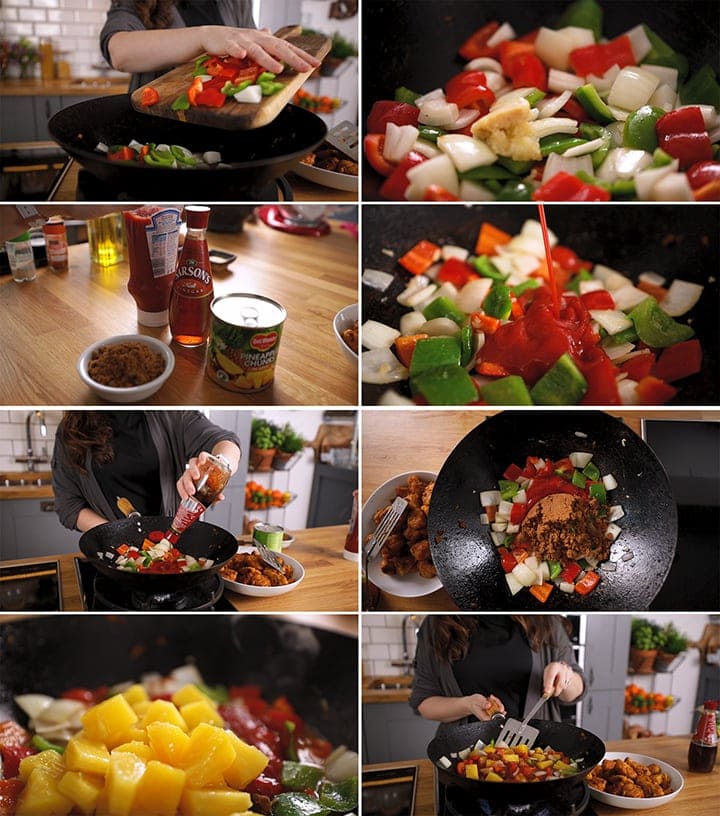
Let the sauce bubble for a few minutes, so it thickens slightly like this (it will thicken a little more when you add the chicken back in).
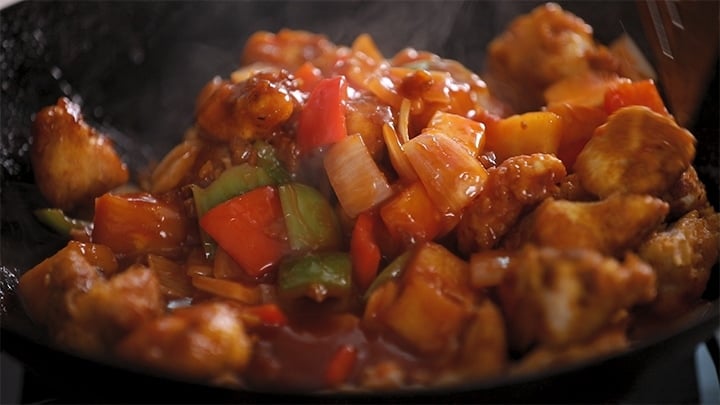
Then add in that crispy chicken and carefully toss in the sauce. So tasty!!
Pin this now to find it later
Pin ItI love take out sweet and sour chicken, but there are a couple of things I don’t love:
- The sauce is too bright orange – like glow in the dark orange. I’ve heard they use food colouring to get it that vivid (does anyone know for sure? let me know in the comments). Mine’s very red (from the ketchup) but the colour is toned down by the addition of dark brown sugar.
- The crisp coating is often flavourless. It’s more there for crunch, rather than to add additional flavour. I add extra seasoning and spices into my coating, so even without the sauce, it tastes delicious.
Different Cooking Methods
Can I Bake Sweet & Sour Chicken?
Yep! I have a recipe for baked sweet and sour chicken on the blog too.
Can I Make this in the air frier?
This was a common request so I tested an air fryer sweet and sour chicken that works too.
🍽️ What to serve it with
- Boiled rice – check out my full post on how to boil rice.
- Egg Fried Rice – my personal favourite side for this sweet & sour
- Special Fried Rice – masterclass post on getting it perfect!
- Some Stir Fried Noodles with beansprouts for a lovely noodle side dish.
- How about Salt & Pepper Chips – Chris loves to pour the sauce over these!
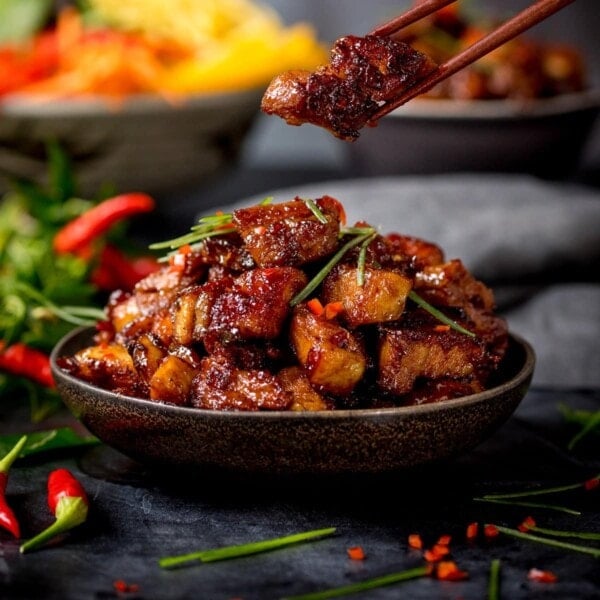
- Maybe add a side of spare ribs? These are Asian style ribs topped with crispy onions, inspired by a restaurant we went to in China town in London.
📺 Watch how to make it

Sweet and Sour Chicken Recipe
Ingredients
- 5 tbsp vegetable oil
- 2 eggs lightly beaten
- 3 tbsp cornflour (cornstarch)
- 90 g (3/4 cup) plain flour (all-purpose flour)
- ½ tsp salt
- ½ tsp pepper
- ½ tsp garlic salt
- 2 tsp paprika
- 3 skinless chicken breast fillets chopped into bite-size chunks
Sauce:
- 1 tbsp vegetable oil
- 1 large onion peeled and chopped into large chunks
- 1 red pepper chopped into 1 inch pieces
- 1 green pepper chopped into 1 inch pieces
- 2 cloves of garlic peeled and chopped/crushed
- 1 tsp minced ginger
- 150 ml (2/3 cup) tomato ketchup
- 2 tbsp malt vinegar
- 6 tbsp dark brown muscovado sugar
- 475 g (17 oz) canned pineapple chunks in juice
To Serve:
- egg fried rice or boiled rice
- 1 tsp sesame seeds
Instructions
- Heat the oil in a wok or large frying pan until very hot.5 tbsp vegetable oil
- Whilst the oil is heating, place the egg in one shallow bowl and the cornflour in another shallow bowl. Add the flour, salt, pepper, garlic salt and paprika to another shallow bowl and mix together.2 eggs lightly beaten, 3 tbsp cornflour (cornstarch), 90 g (3/4 cup) plain flour (all-purpose flour), ½ tsp salt, ½ tsp pepper, ½ tsp garlic salt, 2 tsp paprika
- Dredge the chicken in the cornflour, then dip it in the egg (make sure all of the chicken is covered in egg wash), and finally dredge it in the seasoned flour. Repeat until you've coated all the chicken.3 skinless chicken breast fillets
- Add to the wok and cook on a high heat for 6-7 minutes, turning two or three times during cooking, until well browned. You may need to cook in two batches (I find I can do it in one batch so long as it's no more than 3 chicken breasts).
- Check the chicken is cooked (see notes) and remove from the pan and place in a bowl lined with kitchen towels.
- Whilst the chicken is cooking, you can start on your sauce.
- Add the oil to a large frying pan/skillet, heat it up on a medium-to-high heat and add in the onions and the peppers . Cook for 3 minutes, stirring every now and then, until the onions start to go translucent.1 tbsp vegetable oil, 1 large onion , 1 red pepper, 1 green pepper
- Add in the garlic and ginger and cook for another minute.2 cloves of garlic, 1 tsp minced ginger
- Add the tomato ketchup, vinegar, dark brown sugar, and the tinned pineapple (including the juice) and stir. Bring to the boil, and then turn down the heat and let it bubble, stirring every so often, until slightly thickened, should take 3-5 minutes.150 ml (2/3 cup) tomato ketchup, 2 tbsp malt vinegar, 6 tbsp dark brown muscovado sugar, 475 g (17 oz) canned pineapple chunks in juice
- Transfer the cooked crispy chicken to the pan with the sauce and gently toss to coat.
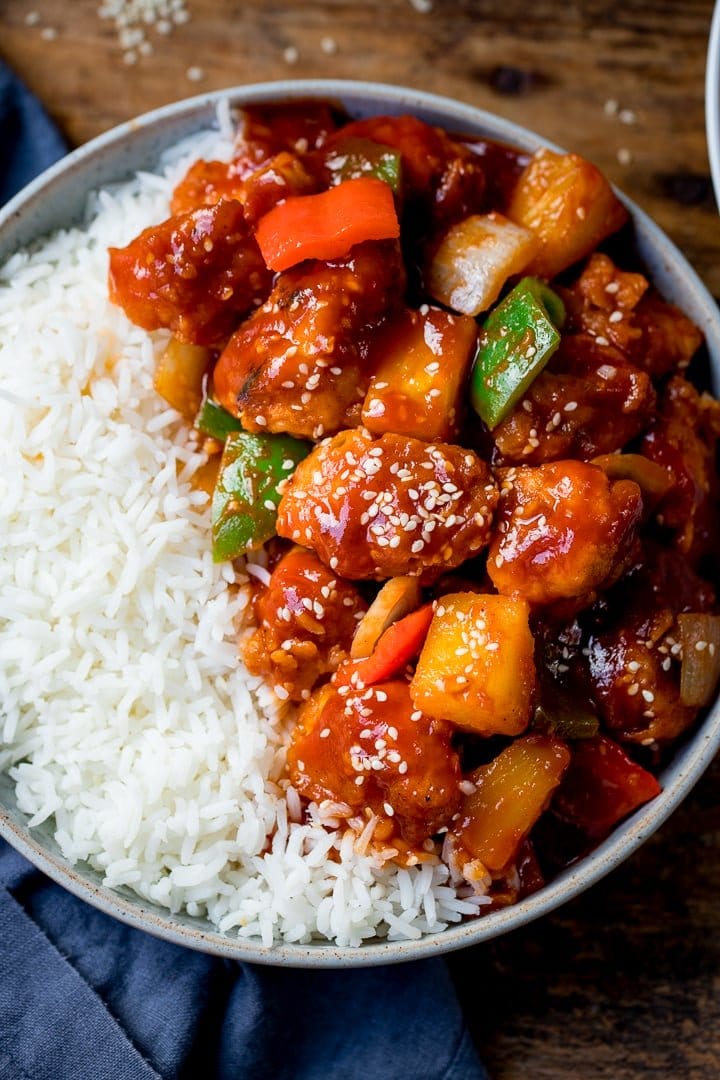
- Serve with boiled or fried rice and a sprinkling of sesame seeds.egg fried rice or boiled rice, 1 tsp sesame seeds
Video
Notes
Check the chicken is cooked
You want to ensure the chicken is fully cooked before serving. Slice open one of the larger pieces you can find, and make sure it’s no longer pink in the middle. If it’s white with no pink areas, it’s cooked Nutritional Information is per serving including sesame seeds, but not rice (I don’t know how much rice you’re going to serve this with :-))Nutrition
Nutrition information is automatically calculated, so should only be used as an approximation.
This sweet & Sour Chicken recipe was first published in September 2019. Updated in September 2024 with extra FAQs. Updated since with additional improvements and for housekeeping reasons.
🥡 More takeaway inspired recipes

Some of the links in this post may be affiliate links – which means if you buy the product I get a small commission (at no extra cost to you). If you do buy, then thank you! That’s what helps us to keep Kitchen Sanctuary running. The nutritional information provided is approximate and can vary depending on several factors. For more information please see our Terms & Conditions.


Very easy to make and so tasty
Looks delicious. Definitely trying this
Can I freeze this when cooked?
Lovely recipe Sweet Spur chicken.
Absolutely gorgeous, amazingly tasty, sweet and tangy.
I’ve always steared clear of sweet-and-sour dishes from Chinese restaurants or takeaways because I didn’t think I’d like the sweet and savoury together and also because of the MSG the majority of Chinese chef’s use.
Just goes to show that it’s not required if recipes use plentiful seasoning and the right ingredients.
Try this, you will ‘not’ be disappointed!
I love your work and want to be part of your members. I’m excited about many of your recipes.
My 13 year old made this and it came out perfect! Easy to follow .Our first take at homemade Chinese food and it was a winner. My younger one kept asking for more.
I rarely get involved with back slapping but I really had a good feeling about this recipe.
I was not disappointed with the result.
The coated spiced chicken in it’s self is a very tasty finger food and has other possibilities.
The chicken was glistening and the coating was beautiful.
I will try it with an Indian mint source and side salad. (Chicken Pakora stile)
Added to the sauce, I have just eaten far more than I normally eat.
As I live alone I only placed 10 pieces of coated chicken in the sauce and saved the rest for another day.
It is restaurant quality and far better than anything I have tasted in a jar.
Thank you.
Best sweet n sour I’ve made! Thank you. Made it for the three of us – going to freeze the leftovers