
This post may contain affiliate links. Please read our disclosure policy.

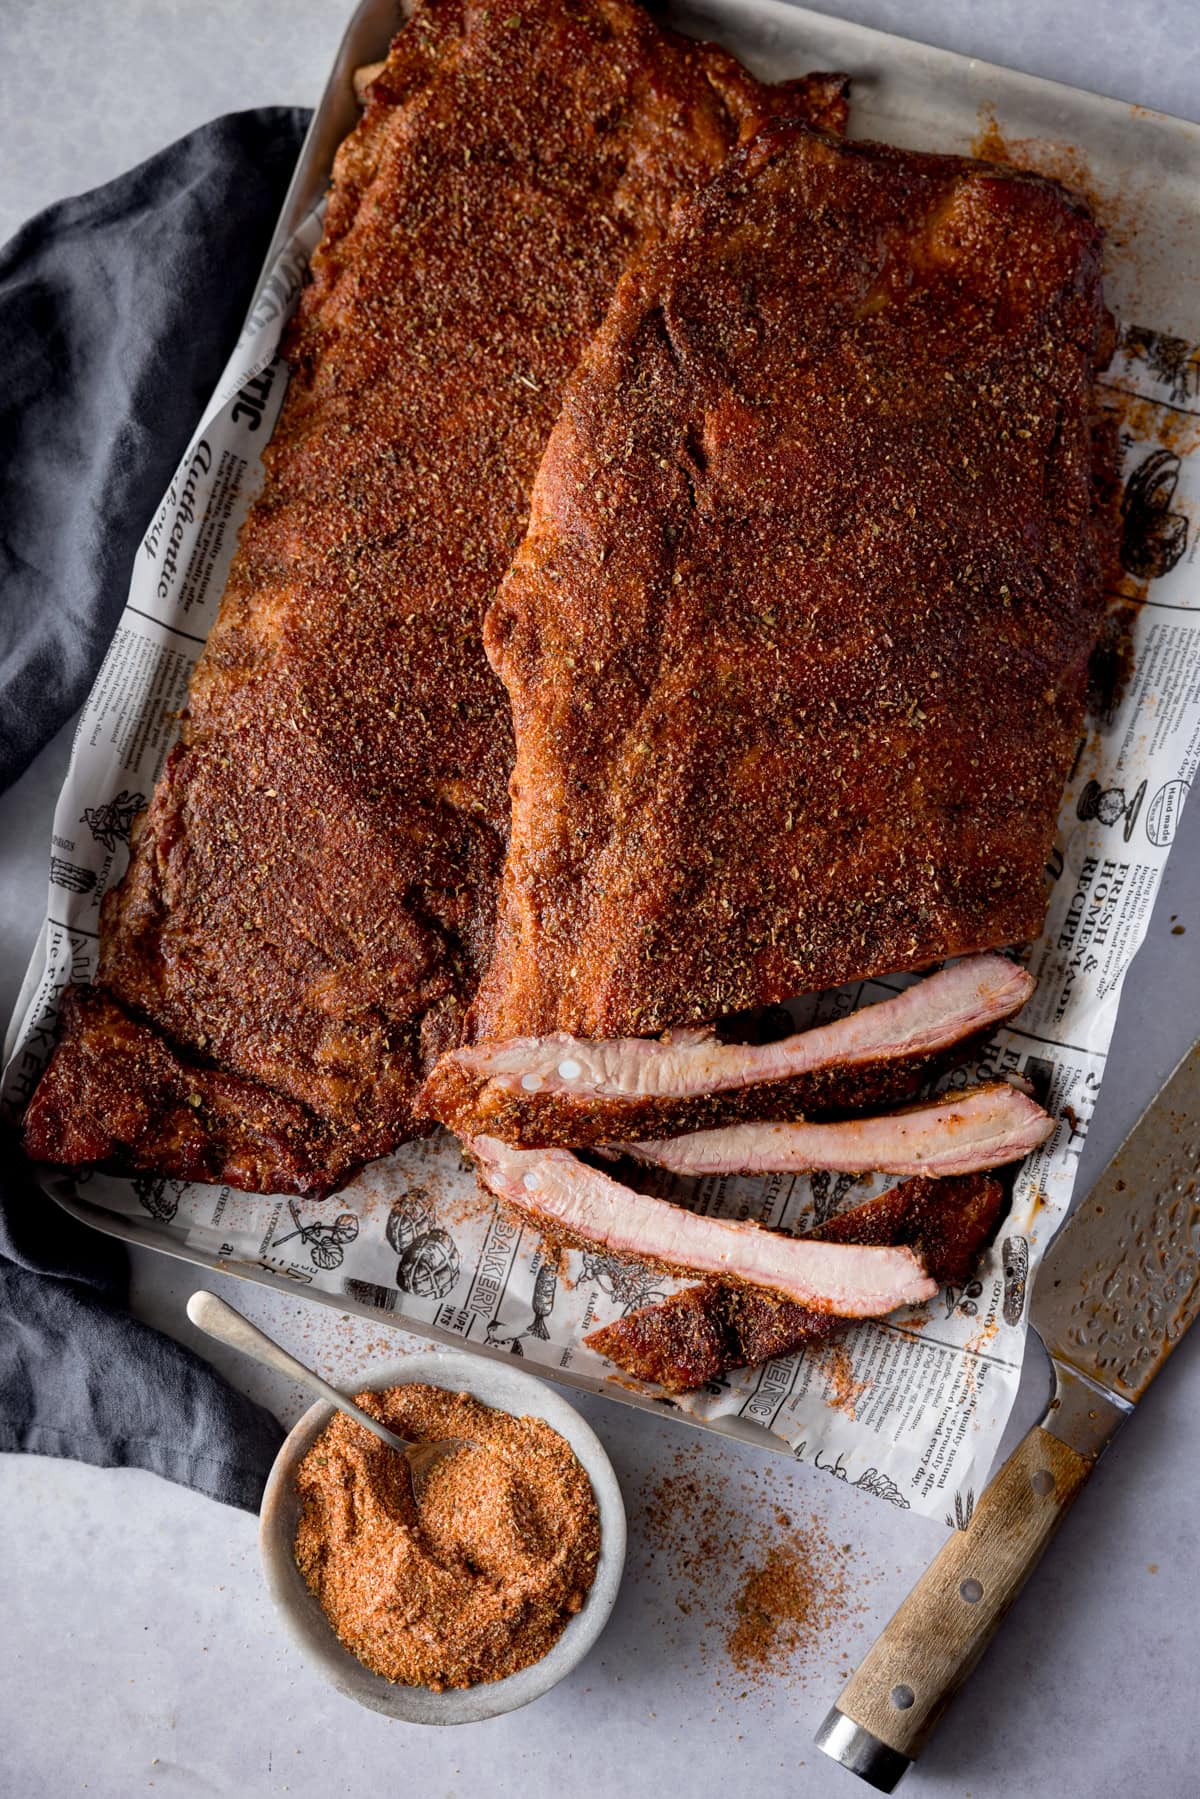
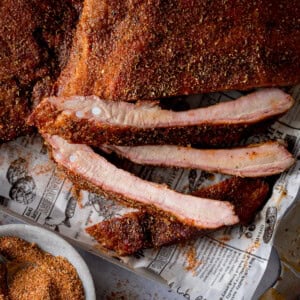
Tender, juicy, dry rub ribs, smoked on the barbecue for that perfect smoky bark, then mopped and wrapped for juicy tenderness and finished with my ultra-flavourful homemade dry rub.
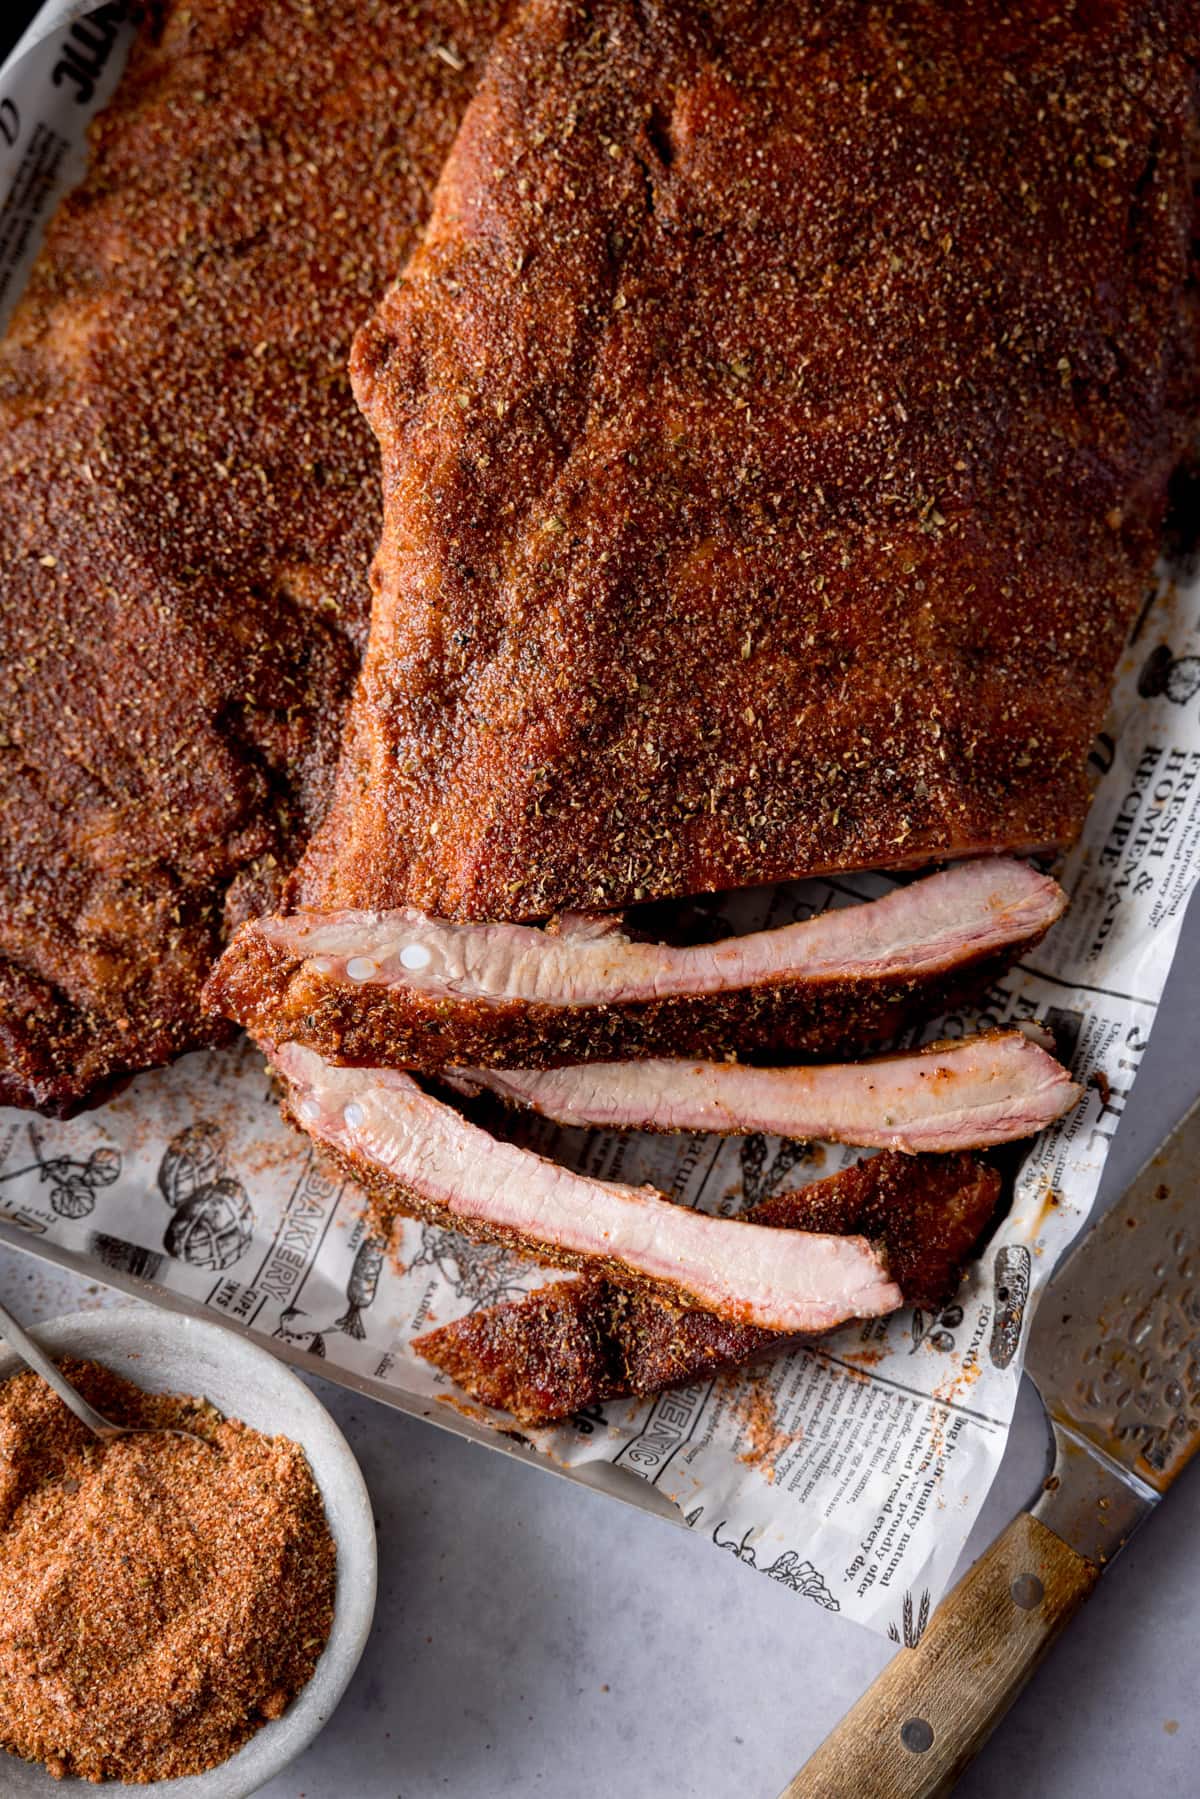
My husband Chris is a big barbecue enthusiast, and we don’t publish nearly enough of his barbeque recipes (mainly because I have to pin him down to get him to write a recipe up!) so this is a nice treat! And a treat these ribs are indeed, that meat is so juicy and tender and the tangy, spicy, sweetness of the dry rub is just so addictive.
We’re just starting to get a few sunny days now so it’s been nice to get out into the garden and get the barbecue going. I just can’t wait for it to get nice and hot so we can have more meals like this!
📋 Ingredients
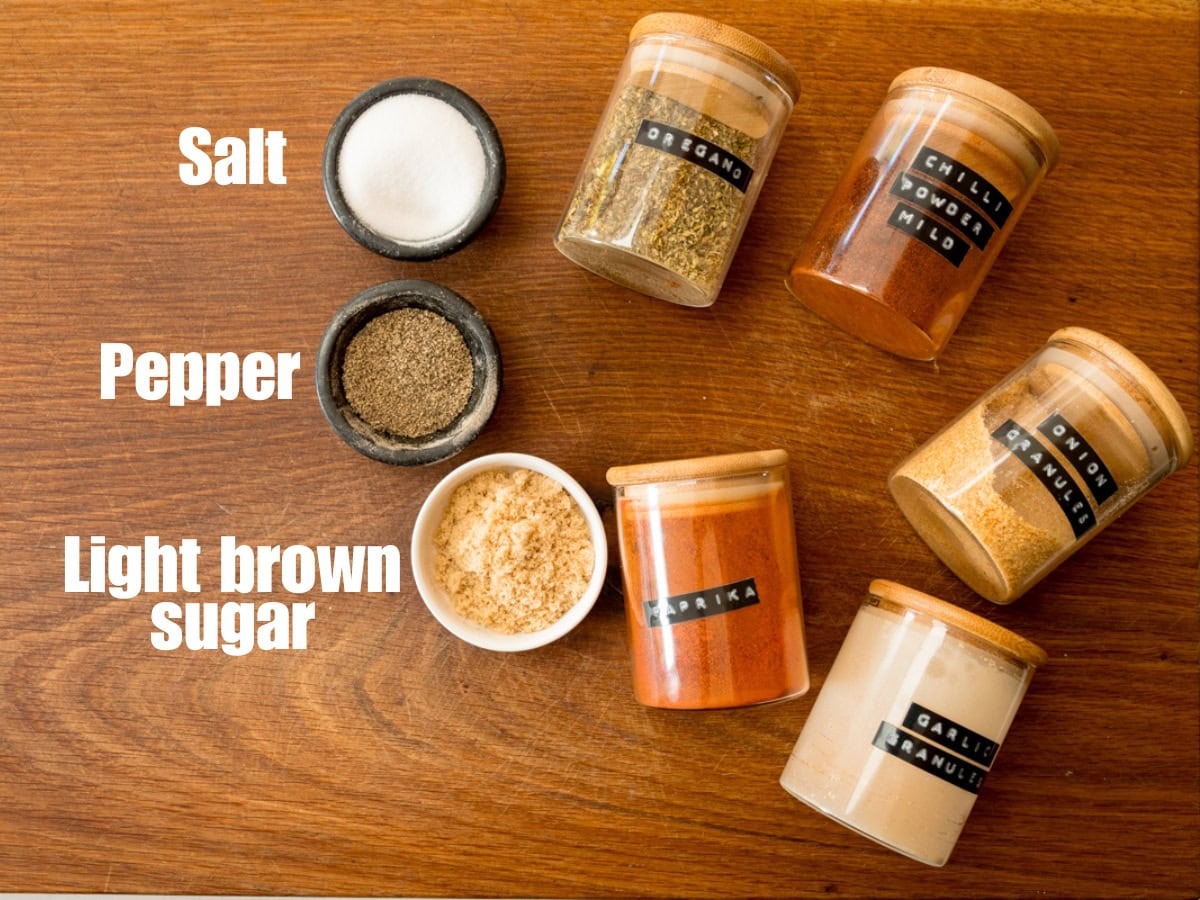
Along with a couple of racks of meaty ribs, which I recommend that you get from the butcher, you’ll also want the following to make a simple dry rub:
- Salt
- Pepper
- Light Brown Sugar
- Oregano
- Mild Chilli Powder
- Onion Powder
- Garlic powder (Not garlic salt)
- Paprika
🧑🍳 How to make it
Full recipe with detailed steps in the recipe card at the end of this post.
- Preheat your BBQ to 120C/250F.
- Mix together the rub ingredients, or you can substitute with your favourite rub.
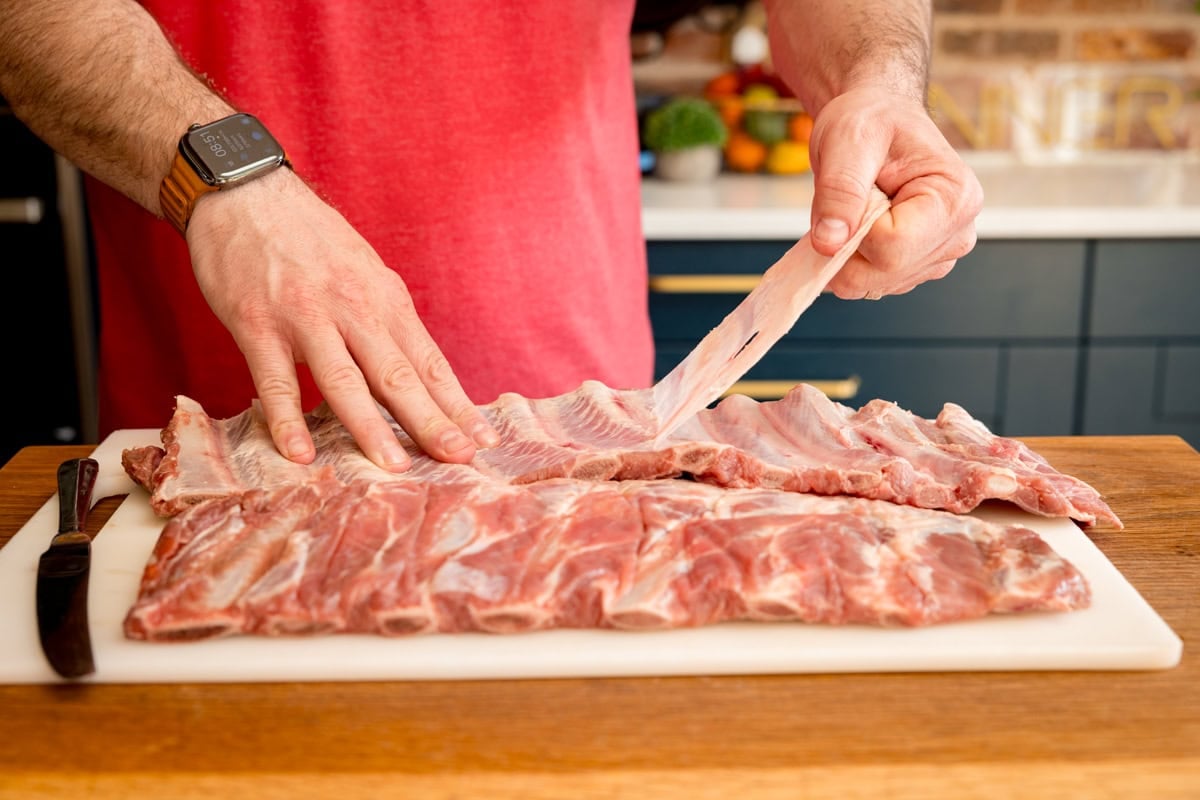
- Prep your ribs by taking them out of the fridge about an hour before cooking, and peel and trim the membrane from the inside of the ribs.
- To remove the membrane from the inside of the ribs you want to get a butter knife or spoon in between one of the bones and the membrane creating a gap. Then (you can use a paper towel for extra grip) slowly pull the membrane away and discard it.
- Pat the ribs dry with some kitchen roll and sprinkle over 1 tbsp of the rub on each rack of ribs.
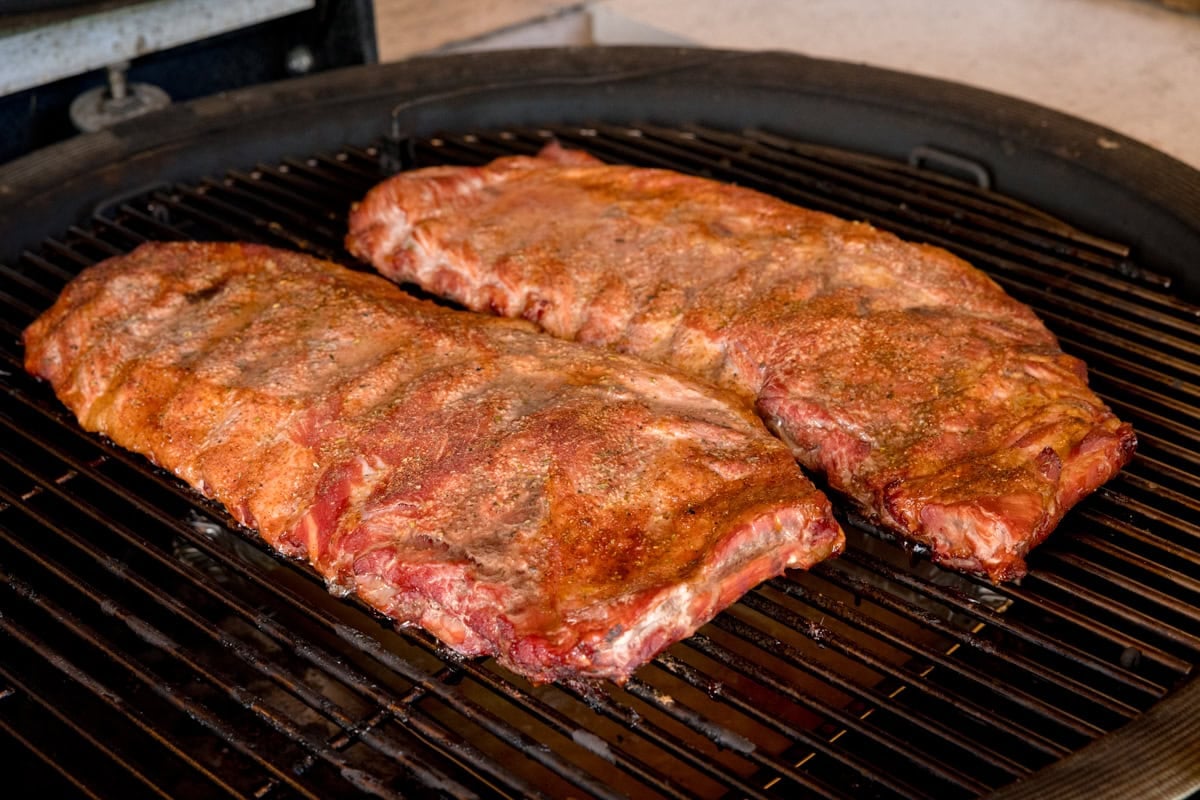
- Once the BBQ is heated up, place a pan underneath where the ribs will be placed and pour in some water (or weak chicken stock). Then place the ribs and let them smoke indirectly for 2 hours.
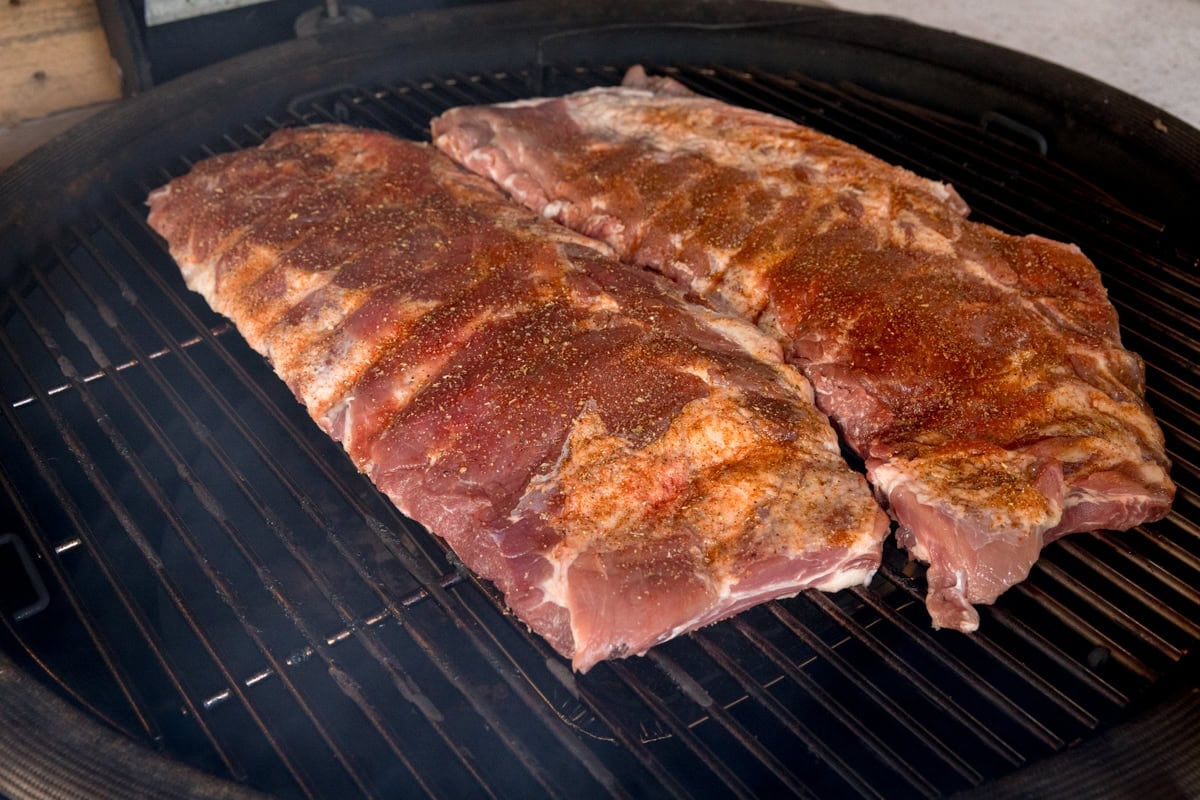
We’re adding the tray of water directly under the ribs to add a little moisture to the BBQ so that the ribs don’t dry out and the meat is lovely and moist.
Pro Tip
Make sure you consider the type of wood you are barbecuing the ribs on as it can affect the flavour. I used applewood because it gives the ribs a lovely smoky and subtly sweet taste.
- Meanwhile, mix the mop (see recipe card for ingredients).
- After 2 hours the ribs will have taken on a lot of that fantastic smoky flavour from the applewood.
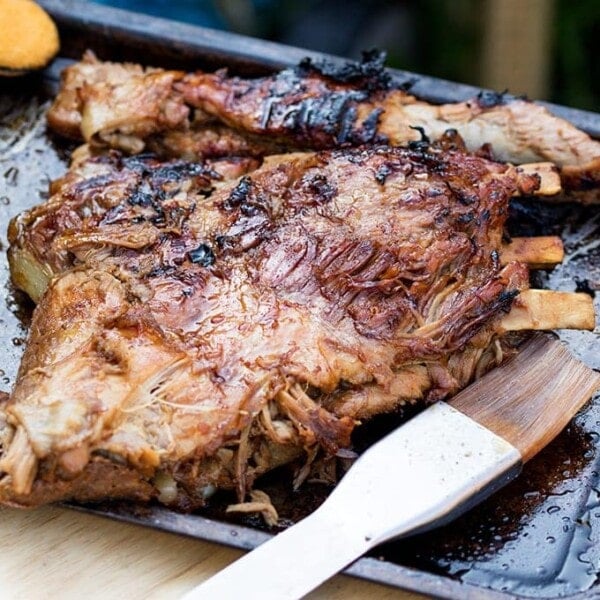
- Take the ribs off the BBQ and brush on the mop.
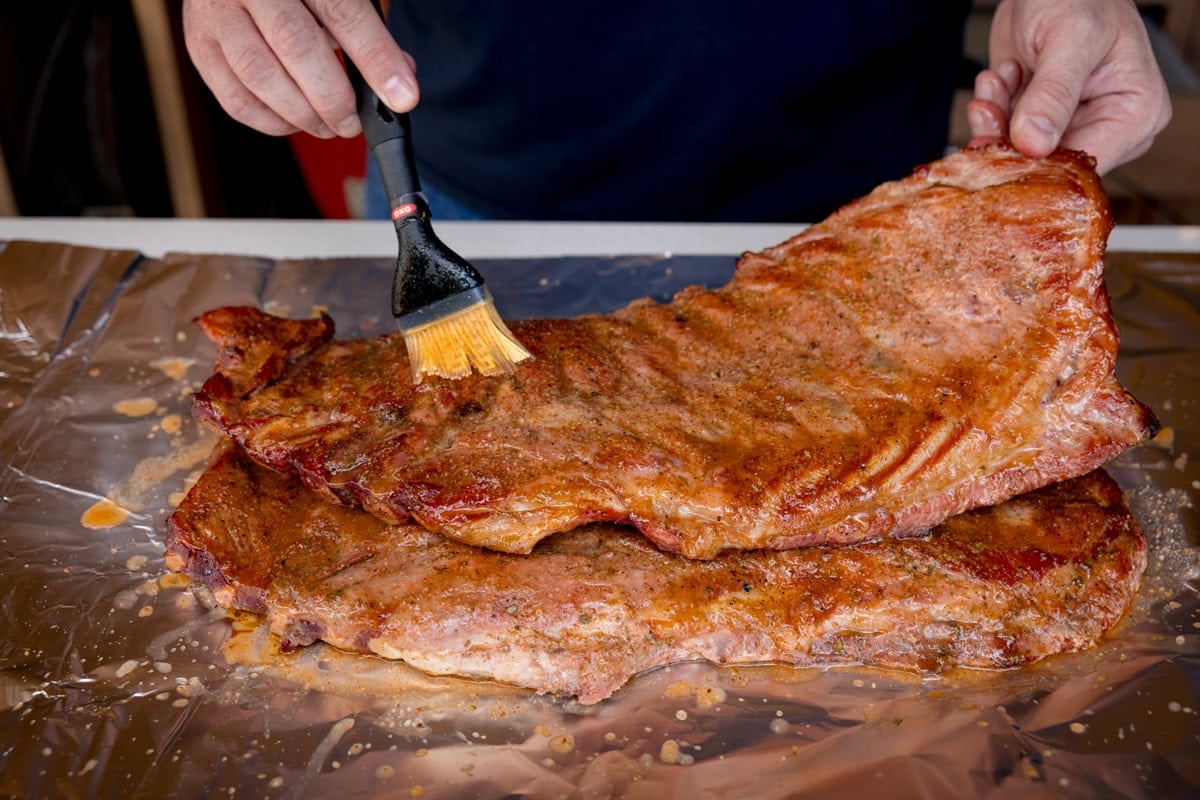
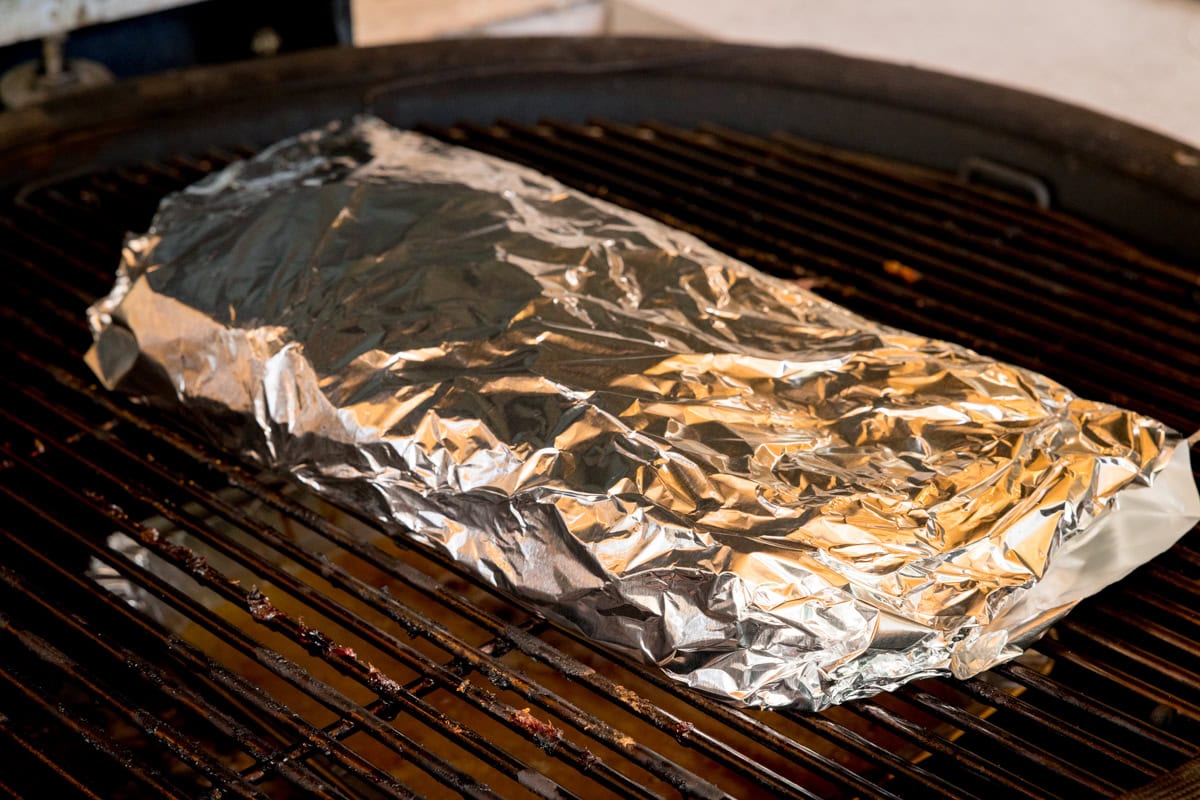
- Wrap the ribs tightly in tin foil and put them back on the BBQ for another 1-2 hours until the meat is starting to pull back from the bones and almost starts to break apart when you lift it from the centre.
- Then, take them off the BBQ and allow them to rest for 20-30 minutes before mopping again, and adding more rub. Then serve.
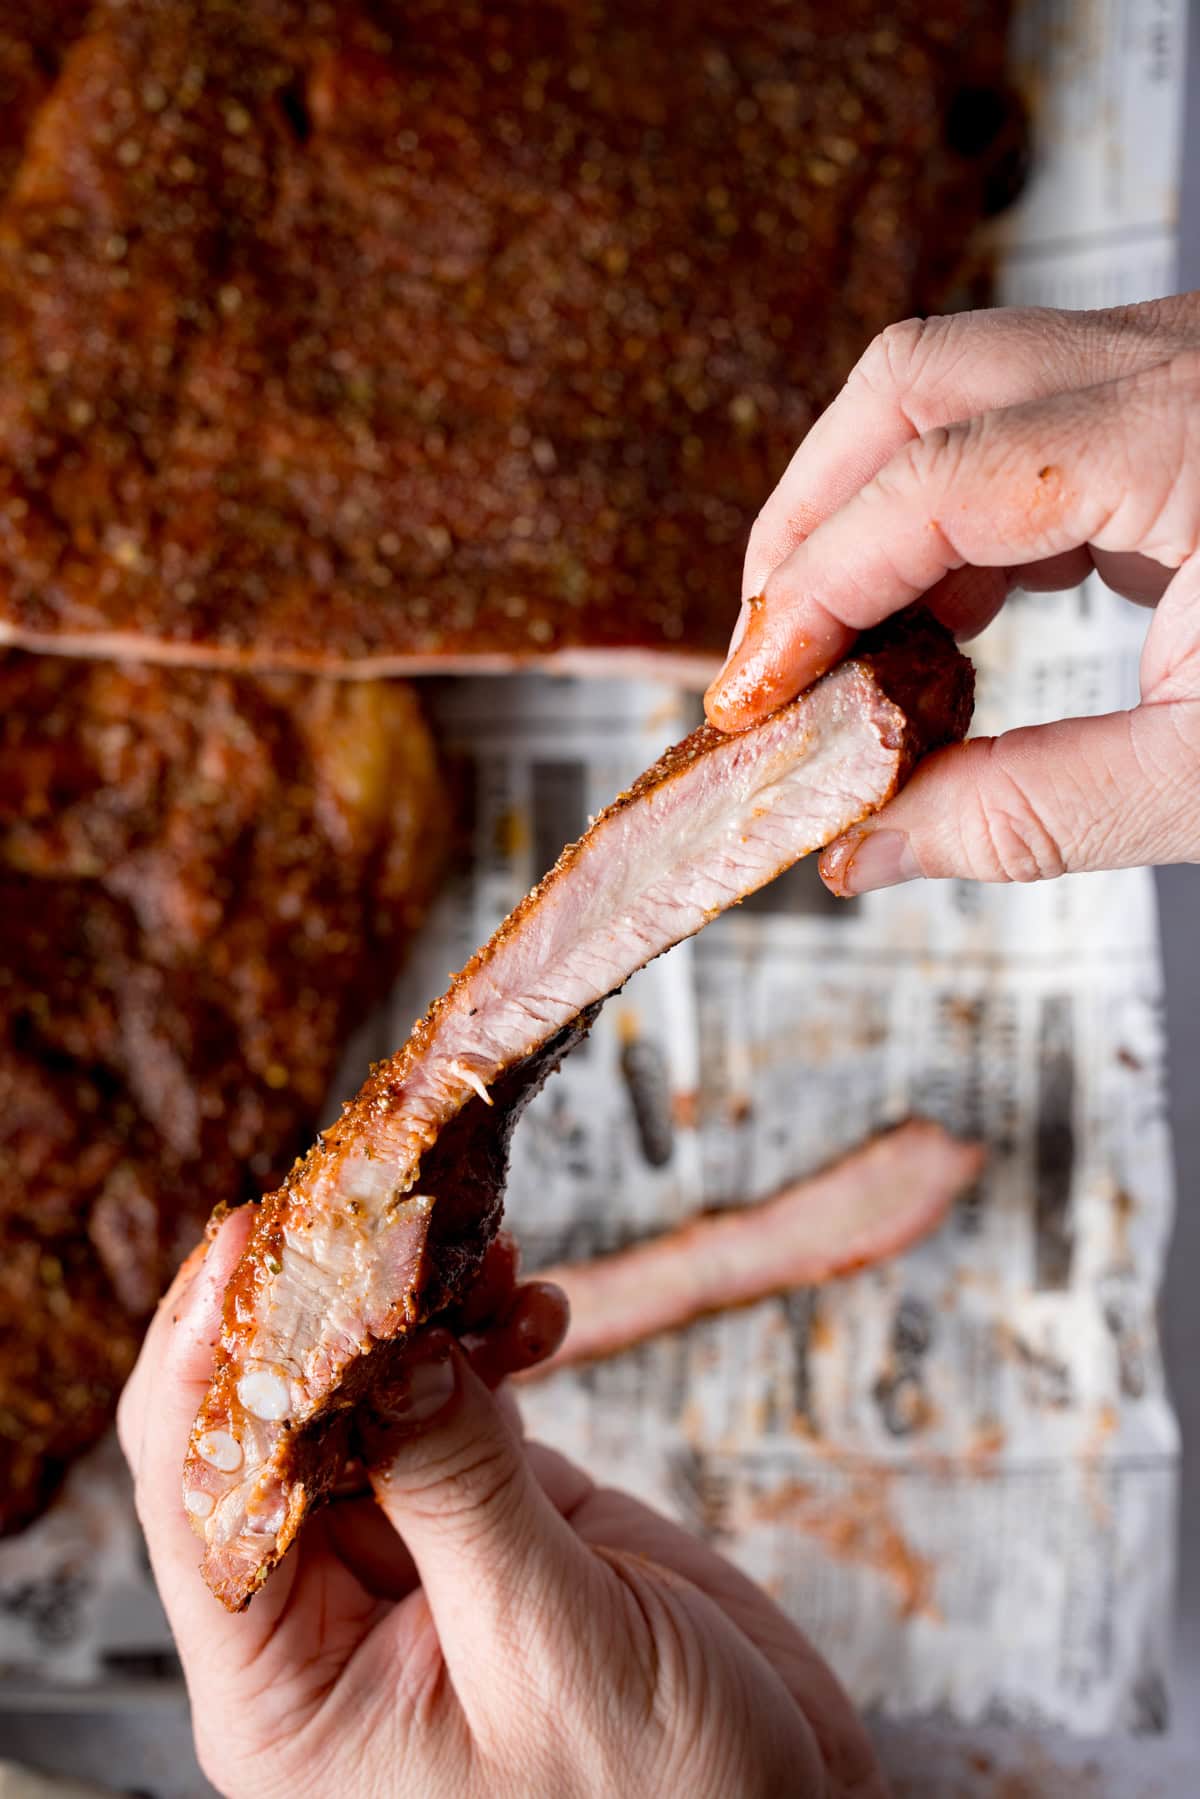
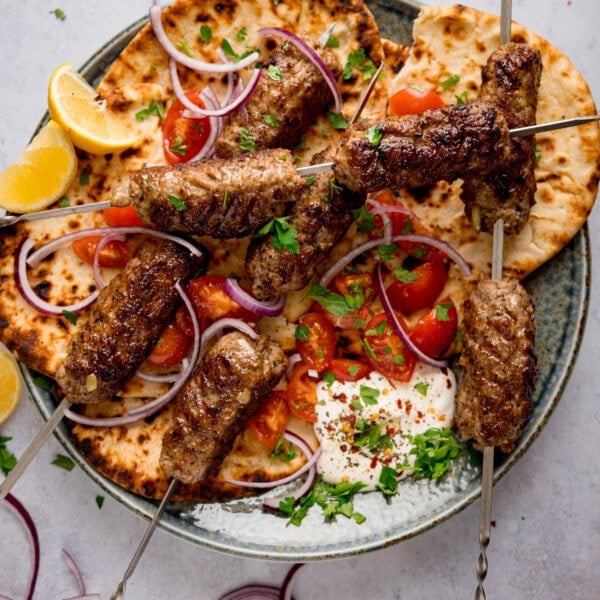
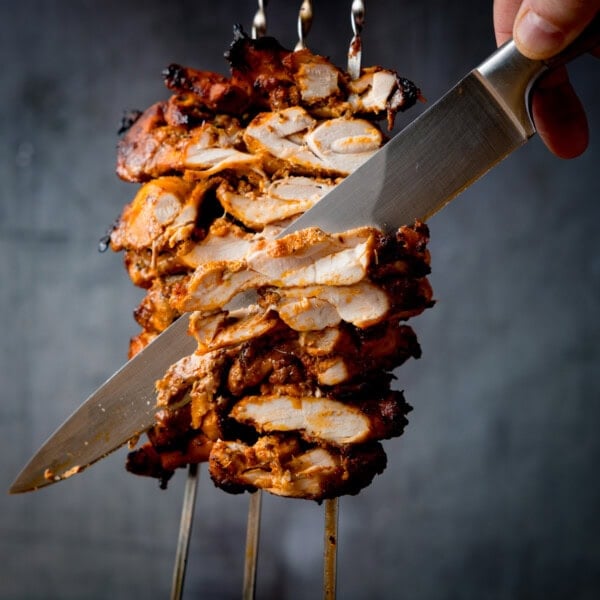
We’re serving the ribs with a generous sprinkling of that delicious dry rub, Just look at this fantastic pink smoke ring.
Pin this now to find it later
Pin It🍽️ What to serve it with
- A classic Mac n’ Cheese goes really well as a Friday night feast. (Pro Tip: Sometimes I like to take the rib meat off the bone and add it on top of the mac n’ cheese!)
- A Creamy Potato Salad is a great addition to the BBQ party table!
- This Quick and Easy Coleslaw takes only 5 minutes and can be easily made while the ribs are resting!
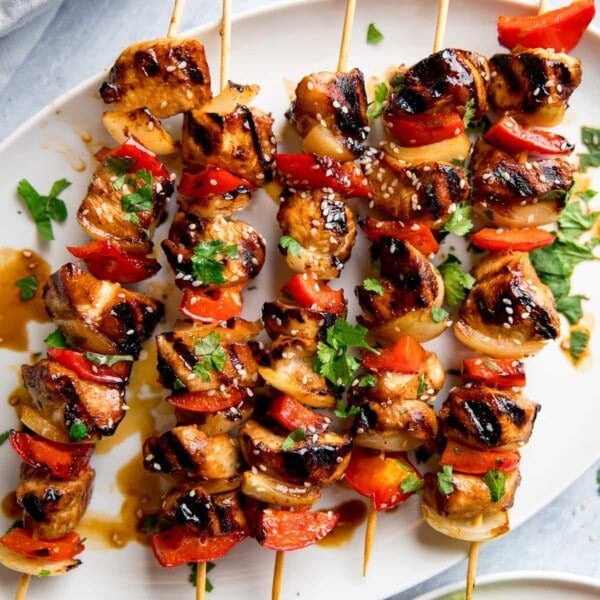
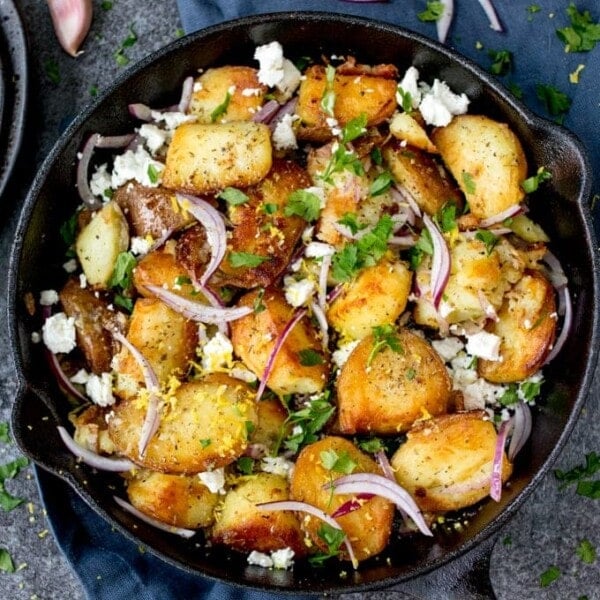
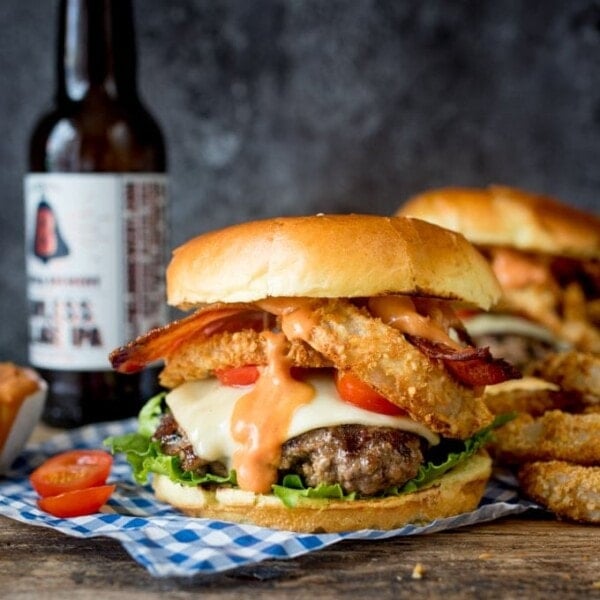
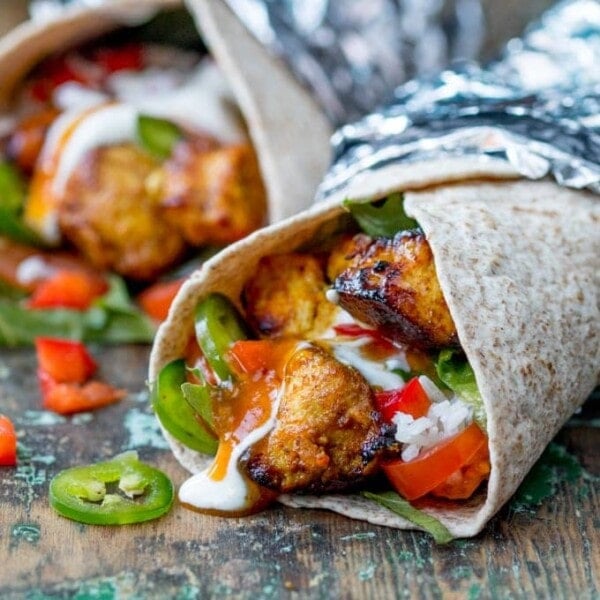
🍲 More brilliant BBQ recipes
Stay updated with new recipes!
Subscribe to the newsletter to hear when I post a new recipe. I’m also on YouTube (new videos every week) and Instagram (behind-the-scenes stories & beautiful food photos).
BBQ Dry Rib Recipe
Ingredients
- 2 racks Pork ribs See note 1
For the dry rub/seasoning:
- 2 tbsp soft brown sugar
- 1 tsp paprika
- 2 tsp salt
- 1 tsp black pepper
- 1 tsp garlic powder
- 1 tsp onion powder
- ½ tsp mild Chilli Powder
- 1 tsp dried oregano
For the mop:
- 1 tbsp of the rub
- 120 ml (1/2 cup) chicken stock
- 60 ml (1/4 cup) Apple Cider Vinegar
Instructions
- Preheat your BBQ or smoker to 120C/250F and set the BBQ up for indirect cooking (see note 1). I use applewood to smoke as I love the flavour of applewood with pork.
- Whilst the BBQ is preheating prepare the ribs and make the rub. Take the ribs out of the fridge an hour before you want to start cooking.2 racks Pork ribs
- Remove the membrane from the inside of the ribs. (See note 2)
- Now make the rub, place all of the rub ingredients in a bowl and mix together until fully combined.2 tbsp soft brown sugar, 1 tsp paprika, 2 tsp salt, 1 tsp black pepper, 1 tsp garlic powder, 1 tsp onion powder, 1/2 tsp mild Chilli Powder, 1 tsp dried oregano
- Pat the ribs dry with some kitchen roll and sprinkle over 1 tbsp of the rub over each rack of ribs (2 tbsp in total). We don't want too much seasoning at this stage as we want the flavour of the smoke to penetrate the rib, creating a lovely bark.
- Once the BBQ is up to temperature then place a pan (or foil tray) in the BBQ underneath where the ribs will be placed and pour in some water or weak chicken stock. (see note 3)
- Add the ribs to the BBQ, close the lid, and leave them to smoke for 2 hours.
- Whilst the ribs are cooking make the mop. Add all the mop ingredients to a bowl and mix until combined.1 tbsp of the rub, 120 ml (1/2 cup) chicken stock, 60 ml (1/4 cup) Apple Cider Vinegar
- After 2 hours, remove the ribs from the BBQ, mop them once and wrap them in foil tightly then place back on the BBQ for a further 1-2 hours, checking on them after 1 hour (see note 4).
- Take the ribs off and allow them to rest for 20 minutes before serving.
- When you're ready to serve mop the ribs then sprinkle on the remaining dry rub. Slice them up and devour.
Notes
Use meaty ribs
You want to use nice meaty ribs. If you’re struggling to find them at the supermarket then I suggest getting them from the butcher. The less meaty the ribs, the quicker the cooking time so you want to keep and eye on them.Note 1 – Indirect heat
You need to set your BBQ up for indirect cooking – so you want a barrier in between the heat and the meat. Some BBQ’s have a ceramic plate in between the charcoal/wood and the grill surface (such as Kamado Joe or Green Egg). Sometimes the heat source/charcoal area is off to one side – so the grill part you’re cooking on isn’t directly over the coals.This means it will be the hot air/smoke that is cooking the ribs slowly – not the heat source itself. This will help you get those nice juicy ribs. Here’s a video we found to show how to set up indirect heat on a Kamado Joe BBQ. I’d recommend searching You Tube for how to do this for your own specific BBQ.
Note 2 – Removing the membrane
To remove the membrane from the inside of the ribs, use butter knife or spoon to get in between one of the bones and the membrane, creating a gap. Then, using a paper towel for extra grip, slowly pull the membrane away and discard it.See the image in the post above to see what this looks like.
Note 3 – Liquid
The foil tray of water/stock adds some moisture to the circulating air – helping to keep the meat moist as it cooks.Note 4 – Cooking time
We want to cook the ribs until the meat is starting to pull back from the bones and almost starts to break apart when you lift it from the centre, the total cooking time will vary depending on how meaty your ribs are. I cook these ribs until the meat pulls away from the bone, is nice and juice but still has a bit of a bite to it. Nutritional information is approximate per rib – based on using 20 ribs altogether.Nutrition
Nutrition information is automatically calculated, so should only be used as an approximation.
Some of the links in this post may be affiliate links – which means if you buy the product I get a small commission (at no extra cost to you). If you do buy, then thank you! That’s what helps us to keep Kitchen Sanctuary running. The nutritional information provided is approximate and can vary depending on several factors. For more information please see our Terms & Conditions.


I hadn’t made dry rub ribs before, I always thought they would be too dry. You’ve proved me wrong, they were delicious. I followed your tip about putting a tray of water under them, which I’m sure helped.