

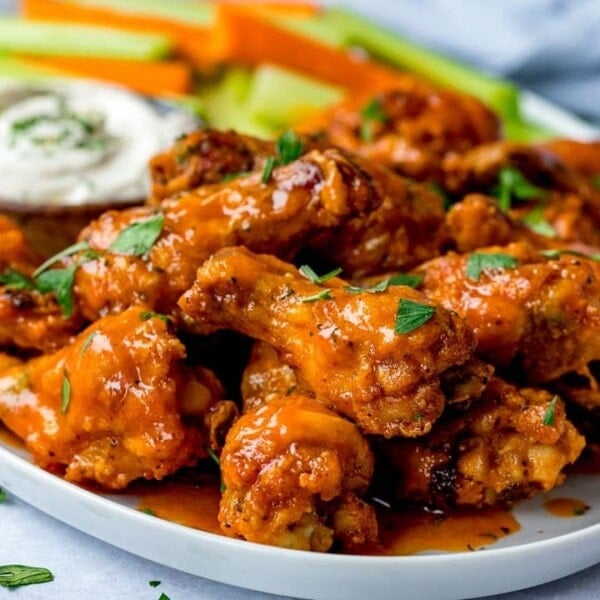
The crispiest chicken wings baked in the oven. The skin is deliciously crisp and salty, with tender meat on the inside. No deep frying required!
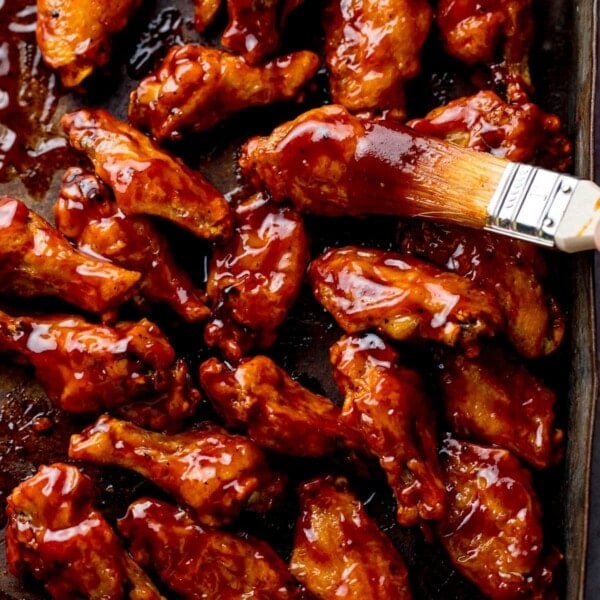
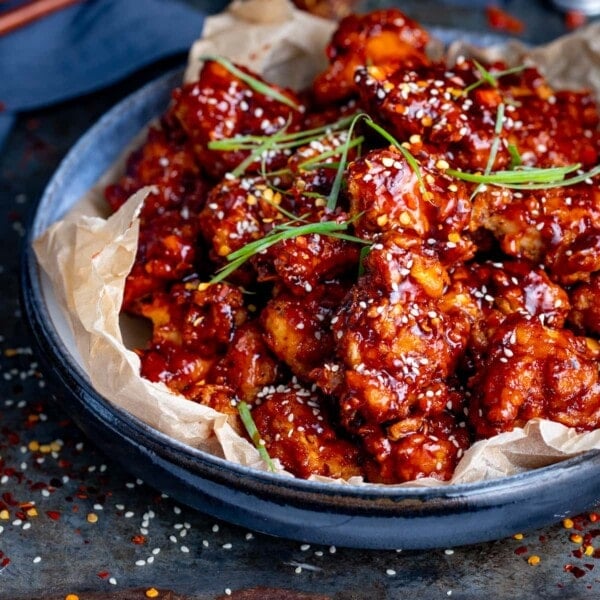
Smother in sauce (yes, they still stay crisp even with the sauce on) to make bbq wings, buffalo wings or sticky Asian-inspired wings.
Or eat as they are – they’re totally moreish without any sauce!
[feast_advanced_jump_to]
I’ve shared a few recipes for crispy chicken wings smothered in sauce, but it occurred to me that I’ve never shared the basic recipe for wings without the sauce.
Don’t ask me why, because these wings are so amazingly tasty on their own. If ever I’m making them with the sauce, at last 5 or 6 ALWAYS get swiped before I can sauce them up.
The taste without the sauce kind of reminds me of salt and pepper chicken – without the chilli heat. In fact you could totally just fry up a few sliced chillies and a sliced onion to put on top and they would be salt and pepper chicken wings (writing that down for later – totally doing that next time…….).
📋 What do we need?
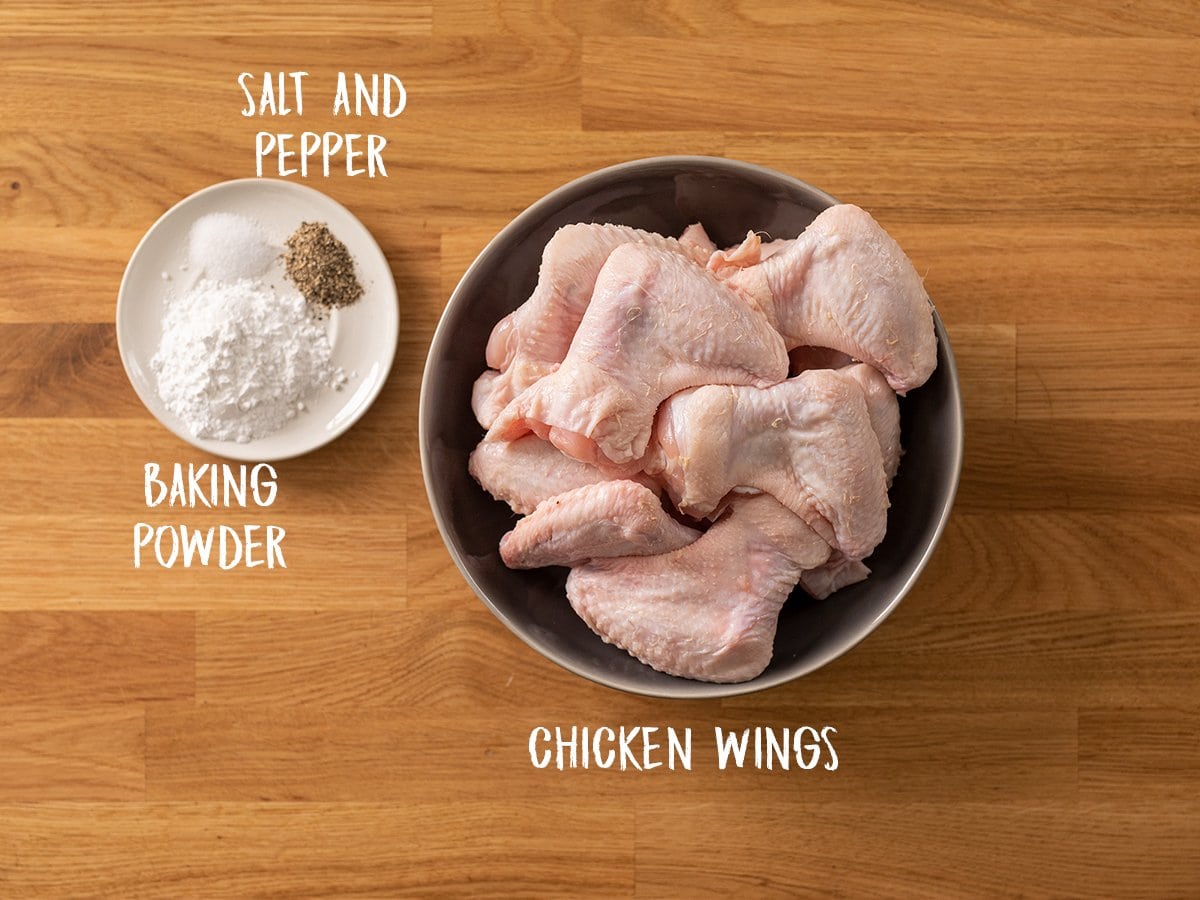
Four simple ingredients.
PLEASE see my notes in the recipe card regarding baking powder and why only baking powder will do, and why you should go for aluminium-free baking powder.
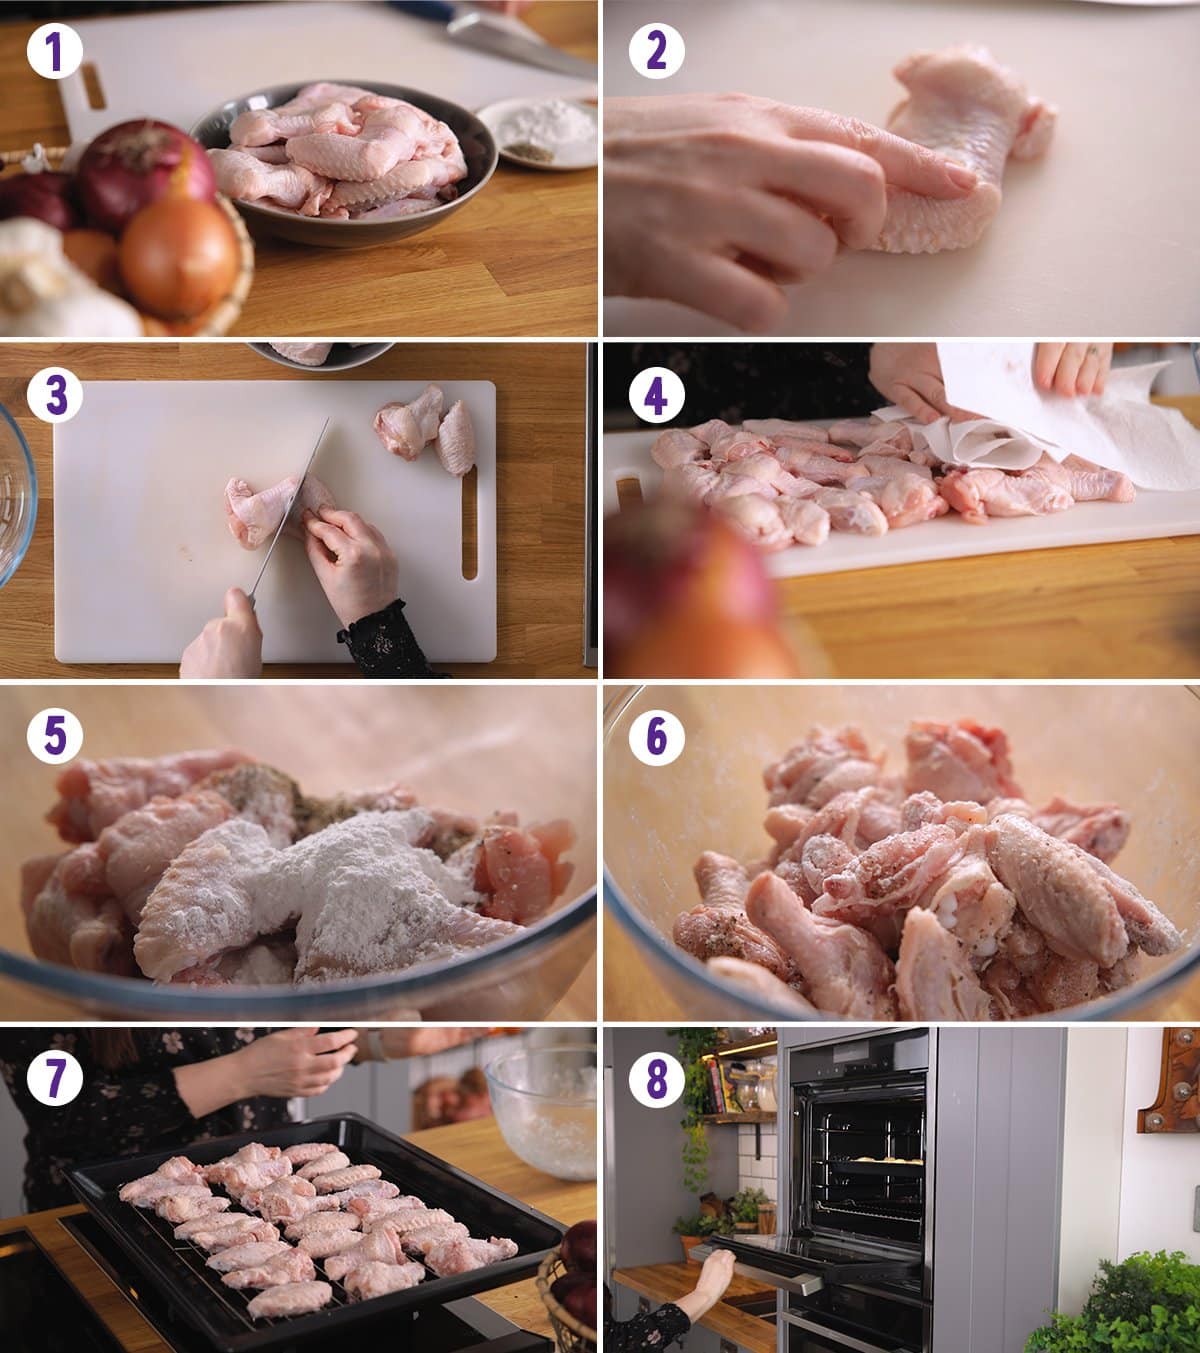
🔪 How to make crispy chicken wings
**Full recipe with detailed steps in the recipe card at the end of this post.**
- We start by carefully cutting each wing into a mini wing and a drumette. You probably noticed before when eating wings that some wings are thinner pieces with a consistent thickness (mini wing) and some are meatier on one end (drumette).
- Once we’ve sliced up the wings, we dry them off – to ensure crispier wings. Then toss them together with a mixture of salt, pepper and baking powder.
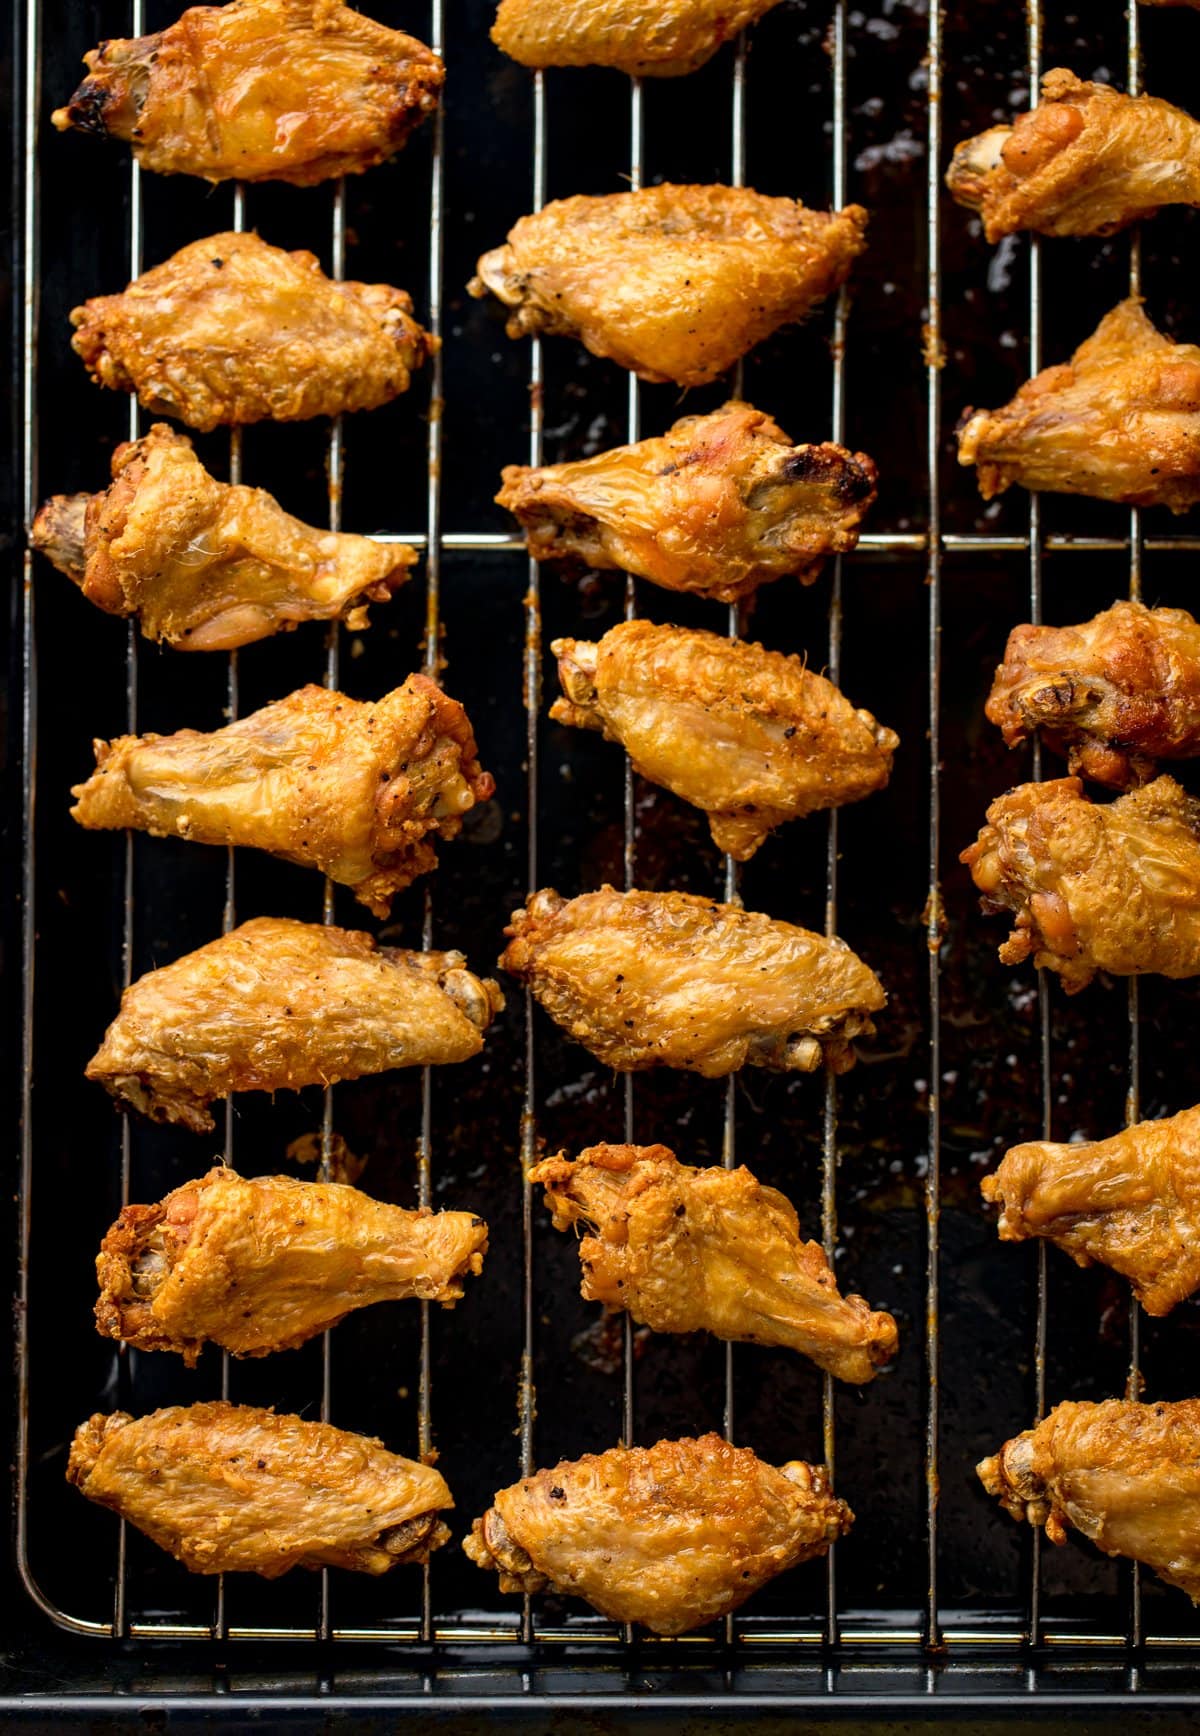
- The wings are baked on a wire wrack (so the fat can drip off underneath – we don’t want greasy wings) – first at a lower temperature to render the fat, then at a higher temperature to crisp up that skin.
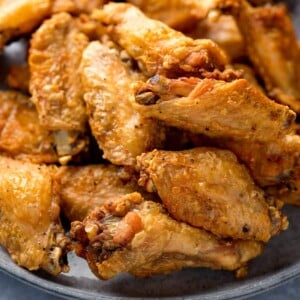
Look how golden and crispy they come out!

🍽️ What to serve them with
Why not serve them as a party food with:
- Cranberry Brie Bites
- Sesame Prawn Toast
- Cheesy Potato Croquettes
- Baked Asian Style Cauliflower Wings
- Cheesecake-Stuffed Strawberries
I won’t tell you how quickly our little family of four can get through FORTY of these wings (but it doesn’t stretch into hours….).

Want to upgrade those wings with a sauce? Try one of these:

Yes, just be sure to use gluten-free baking powder and you’re good to go.
Yes. If you’re using a gas oven, be sure to rotate the tray after the initial cooking time so that the wings cook evenly. Also keep a close eye on the wings, as gas oven temperatures can fluctuate more than electric fan ovens. You may only need to cook at a higher temperature for 20-30 minutes.
No, I wouldn’t recommend that. The bone in the chicken and the fat of the skin helps to keep the chicken juicy. Using boneless chicken would result in chewy, dried chicken. Try my recipe for baked chicken tenders instead.
📺 Watch how to make it
🍲 More fantastic crispy chicken recipes
- Baked
- Crispy Baked Chicken Tenders
- Chicken Parmesan in a rich tomato sauce
- Crispy Baked Sweet and Sour Chicken
- Fried
- Crispy Fried Chicken
- Crispy Chicken Pakora
- Korean Fried Chicken
Stay updated with new recipes!
Subscribe to the newsletter to hear when I post a new recipe. I’m also on YouTube (new videos every week) and Instagram (behind-the-scenes stories & beautiful food photos).
Crispy Baked Chicken Wings Recipe
Ingredients
Crispy Chicken Wings:
- 1 kg (2.2 lbs) chicken wings
- 2 level tbsp aluminium-free baking powder It has to be baking powder NOT baking soda – see further notes on baking powder below
- ½ tsp salt make sure it’s regular table salt
- ½ tsp pepper
Instructions
- Preheat the oven to 120C/250F (fan) and place a rack on a large baking tray.
- Cut each wing at the joint so you have a mini wing and a drumette.1 kg (2.2 lbs) chicken wings
- Dry the wings with paper towels, then place in a large bowl and add the baking powder, salt and pepper. Toss to combine. Note – it's important to dry the wings first so they only get a light coating.2 level tbsp aluminium-free baking powder, ½ tsp salt, ½ tsp pepper
- Place in a single layer on the rack, skin side up. It's fine for them to be touching. Discard any remaining coating once tossed together.
- Place on the lower shelf of the oven for 30 minutes.
- After 30 minutes, turn the oven up to 220C/425F (fan) and rotate the tray for even cooking. Cook for a further 45-50 minutes until the wings are lightly golden and crispy.
- Take out of the oven to cool slightly before serving.
Video
Notes
After doing a little research, it seems that some people can be sensitive to the taste of sodium aluminium sulfate – which can be an ingredient in some baking powders. People who are sensitive to it notice a bitter taste. If you are sensitive to it, you may have noticed certain cakes taste bitter. However, cakes contain a lot less baking powder then this recipe, so you may not have noticed it before and still been sensitive to it. My tips would be to:
- Thoroughly dry the wings before dusting with the baking powder – so they only get a light coating.
- Measure the amount of baking powder used exactly, and discard any excess left after tossing together with the wings.
- Use aluminium-free baking powder – make sure it has no aluminum sulfate in it.
She got the original recipe from Cook’s Illustrated “Meat Book” cookbook (fyi – this is an affiliate link, and incidentally, I’ve got a copy of this book, and it’s awesome – so much info on how to perfectly cook meat). Nutritional information is per wingette/drumette (approx 40 wings in this recipe)
Nutrition
Nutrition information is automatically calculated, so should only be used as an approximation.
Some of the links in this post may be affiliate links – which means if you buy the product I get a small commission (at no extra cost to you). If you do buy, then thank you! That’s what helps us to keep Kitchen Sanctuary running. The nutritional information provided is approximate and can vary depending on several factors. For more information please see our Terms & Conditions.


The recipe that calls for “baking powder” , without aluminum sulfate. Where is this product sold.
Should I ask what brand is aluminum sulfate free???
Hi Maria, just check the ingredients on the side. If the ingredients contain alumininum sulphate then don’t use for this recipe. I use Dr. Oetker baking powder.
I have made this recipe at least 4 or 5 times and they are the best! Very crispy.
If you bake chicken wings at 425 for 50 to 60 minutes after baking for 30 minutes on a lower temperature, they will be charcoal. ????
I have made this recipe twice…the skins has been rubbery both times.i followed the recipe as it states. Wiĺl not waste wings again
Actually, you can freeze any leftover baking powder mixture to use again. I do this when I do fried chicken. And the cutoff ends can be frozen for use in bone broth. I however, like them so I cook them and nibble them. The skin and fat have benefits. 🙂
When the recipe says “Preheat the oven to 120C/250F (fan)”, does that mean to use the convection oven instead of conventional?
Hi Adam, yes it means that i’m using a convection fan oven, and that temperature is the setting for a fan oven (non-fan/conventional usually run at a slightly lower temp than a fan oven. So if I was using a non-fan oven, I usually add around 10-15 degrees C – but there are conversion charts online that will tell you more accurate temp conversions for between fan and non-fan ovens).
Excellent! I’ve finally found the recipe I’ve been searching for. Thank you sweetheart.
Made this last night. I was skeptical about them coming out crispy but to my surprise they were! Even after I doused them in Buffalo sauce; they maintained their crunch. Thank you!!
Why does have to baking powder free? I only the one with the Alumin? Can I u
se it ?
Thanks for this wonderful recipe and video! I really loved seeing the time lapse of the wings cooking. You’re really clear in your instructions with none of the usual side chat banter that I often see with food vloggers. I appreciated your explanation about why to purchase aluminum free baking powder. Didn’t know that!
Anyway, I’ll be trying your recipe in the next day or two and thank you!