
This post may contain affiliate links. Please read our disclosure policy.


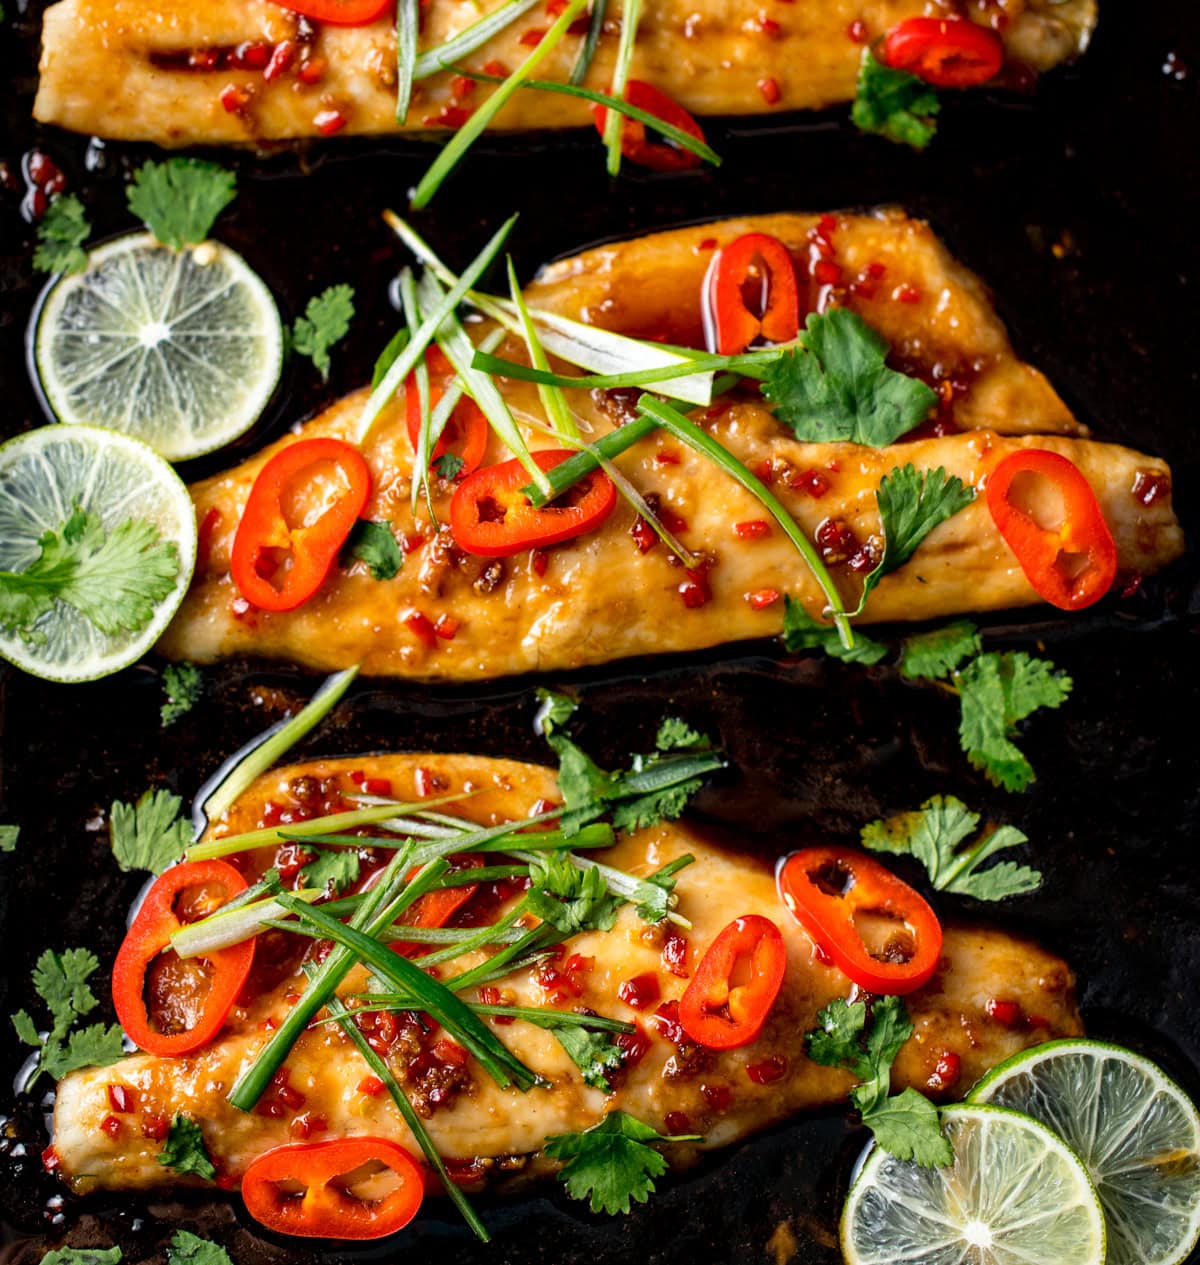
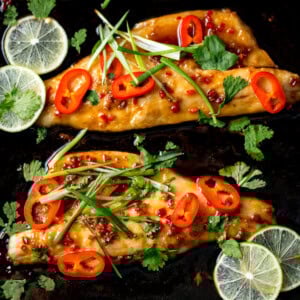
Soft, flaky sea bass, drizzled in a sweet, spicy sauce and baked in the oven. Super quick and easy – ready in 12 minutes!
“I love this recipe made it many times it’s a great crowd pleaser, it looks so professional”
Nicky’s Notes

Glazed with a sticky chilli sauce this sea bass goes perfectly with some egg fried rice or noodles.
I’d been cooking this dish since I went on my knife skills course at Leiths School of Food & Wine a few years back. We gutted and filleted one, then cooked it en-papillote with a mountain of chilli and coriander for lunch.
Oh man it was good. And it inspired me to come up with this simple dish!
- It’s super fast to make – even faster than throwing some fish fingers in the oven (4 mins prep, 8 mins cook)!
- It’s feels a little fancy, but with minimal effort (my favourite kind of cooking)
- It’s flavour packed, with adjustable heat, great for all palates (see recipe card notes)
Table of Contents
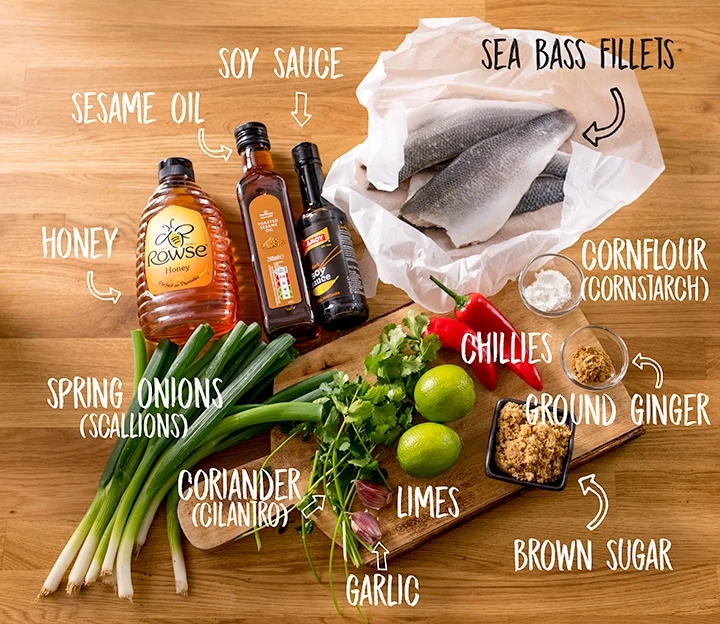
📋 Ingredients for baked Sea Bass
***Full recipe with detailed quantities in the recipe card below***
Skin on or skinless fillets?
Go for skin on fillets (boneless). The skin will help the flesh of the fish hold together better, and will ensure the fish is more tender.
Abbreviated Recipe
***Full recipe with detailed steps in the recipe card below***
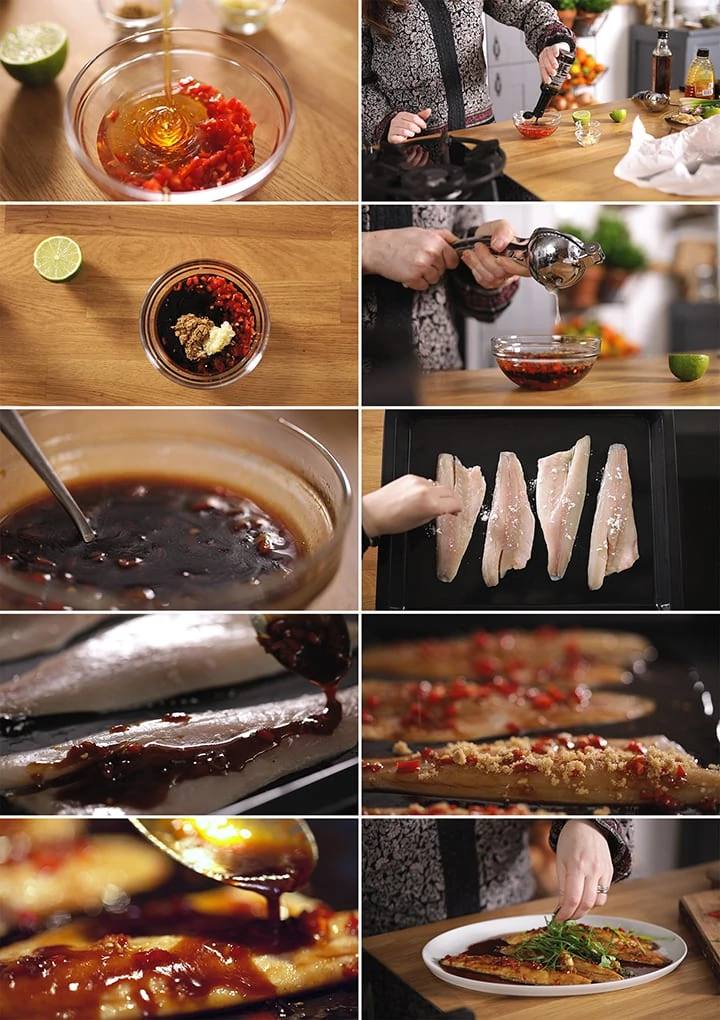
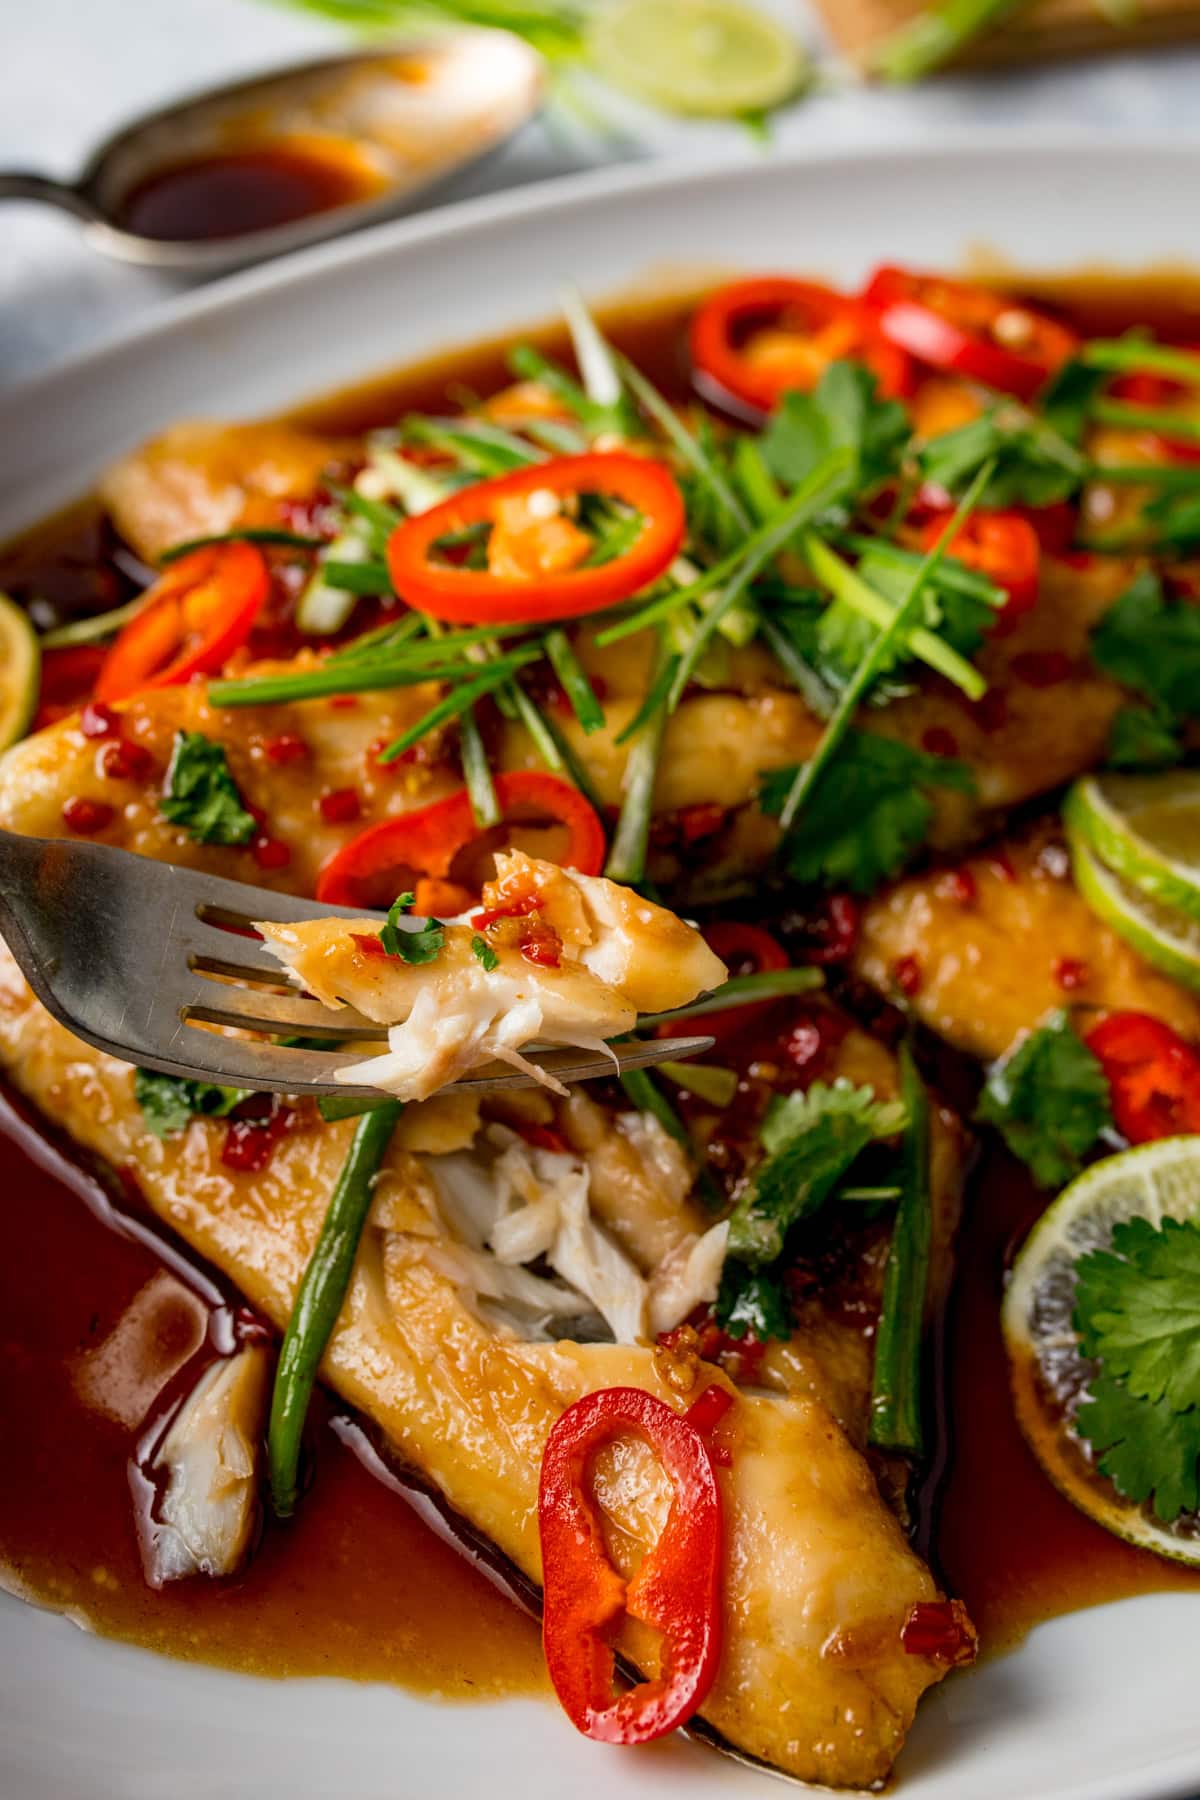
Mix the glaze ingredients in a small bowl. Place the sea bass fillets, skin-side down, on a baking tray. Rub a little cornflour onto each fillet. Pour over the glaze and sprinkle with brown sugar, Cook for 8 minutes, basting half-way through cooking.
Recipe Tips
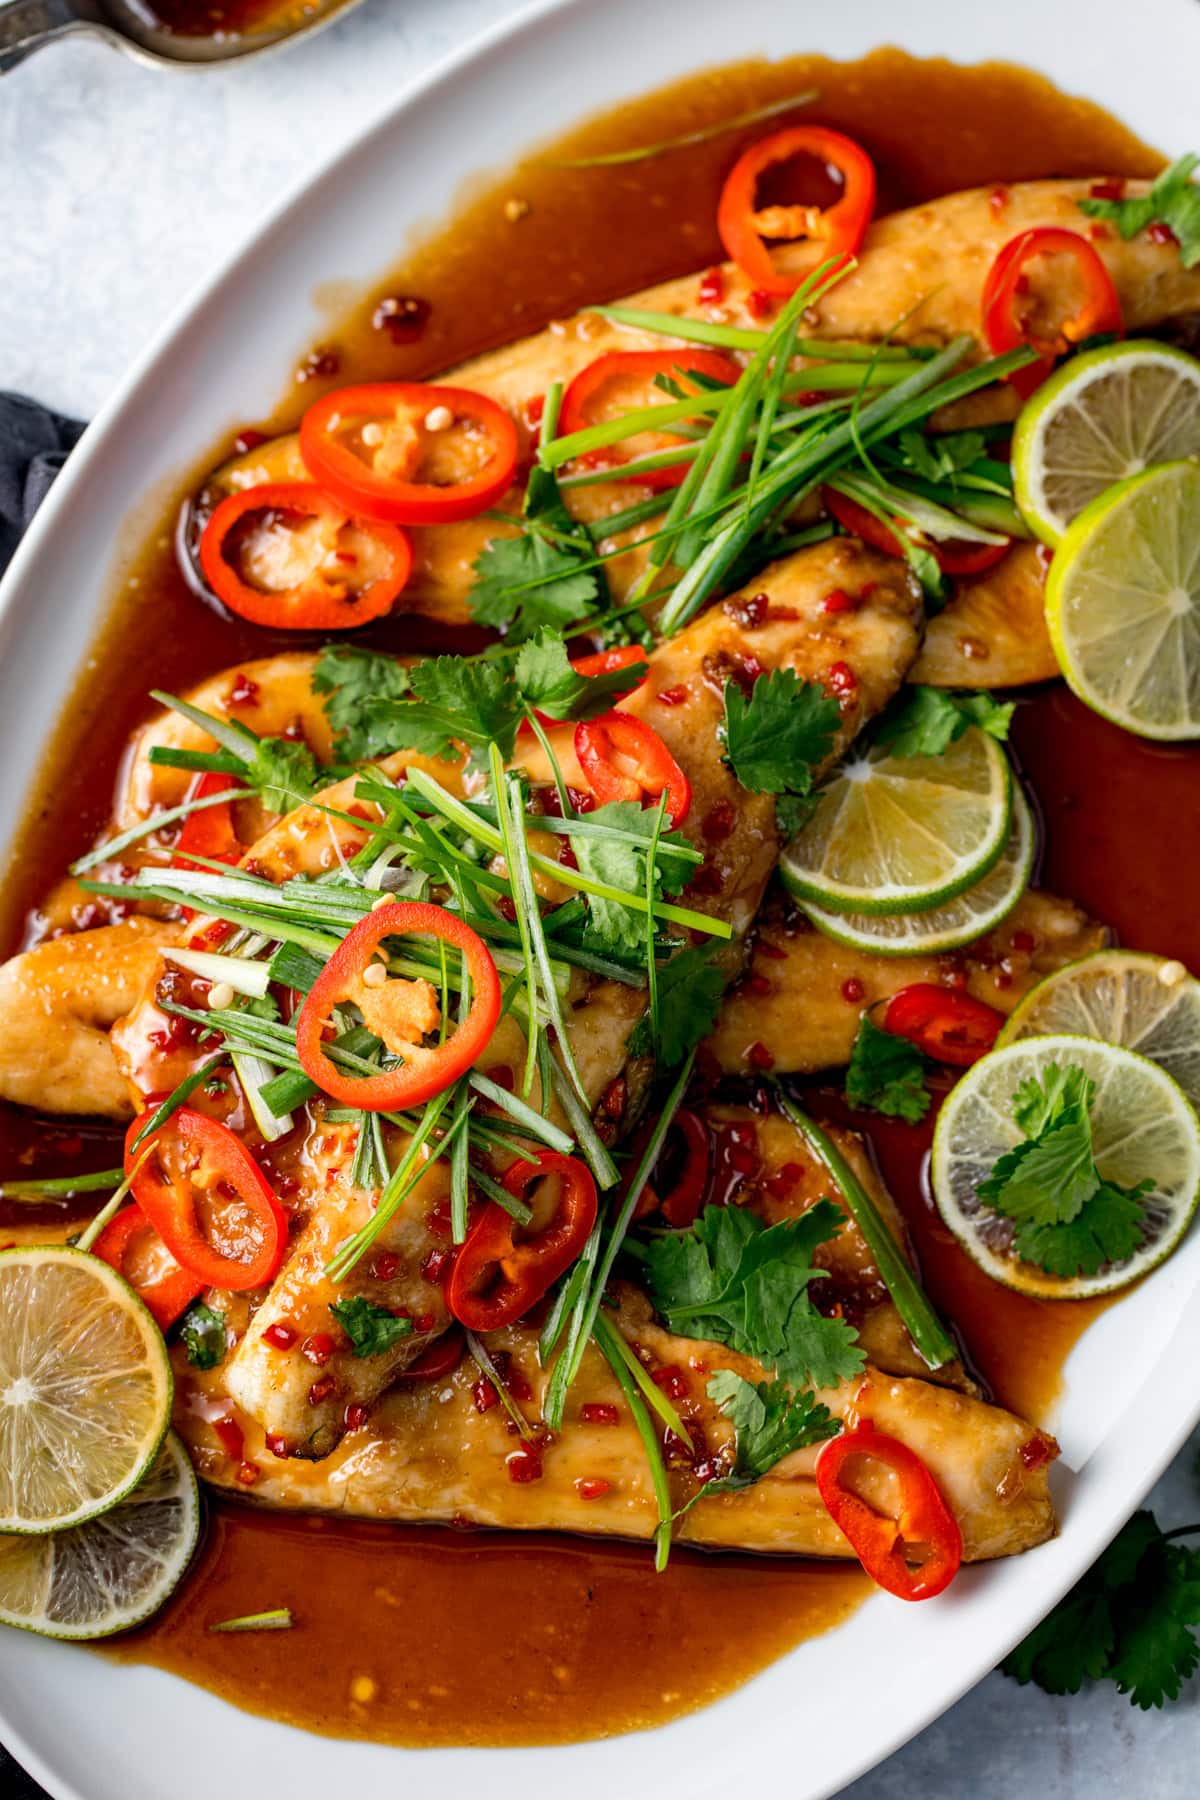
- Sauce looks thin? You’ll see that most of the sauce runs off and pools around the fish when it’s first poured on, but that’s ok. It’ll get thicker and stickier once it’s been in the oven and is starting to cool a little. Just pour that sauce from the tray back over the sea bass when you serve it up.
- Make it your own with different toppings – crispy fried strips of ginger, crispy fried onions (you can buy these ready made from larger stores), chilli flakes, sesame seeds or thinly sliced red onion would all make great alternatives or additional toppings.
Go heavy on the toppings for a lavish-looking platter.
Pin this now to find it later
Pin It🍽️ What to serve it with
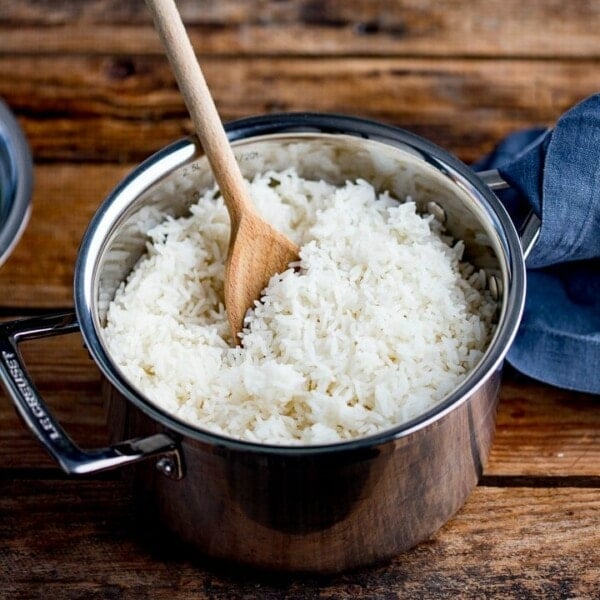
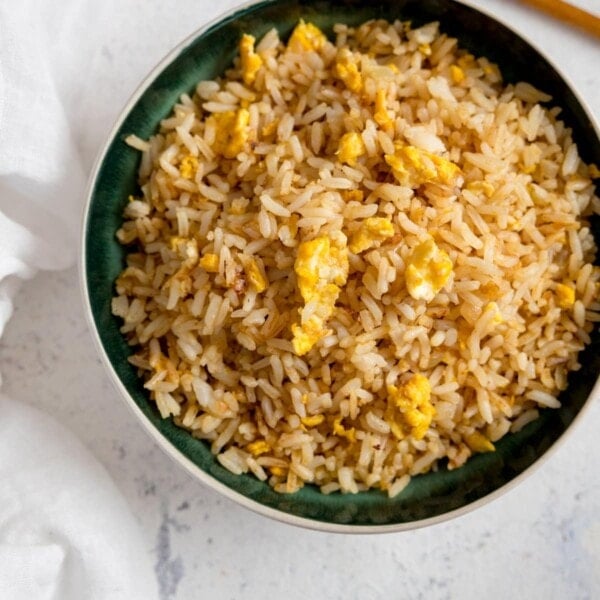
- Boiled rice (the sauce sinks in beautifully) or egg fried rice
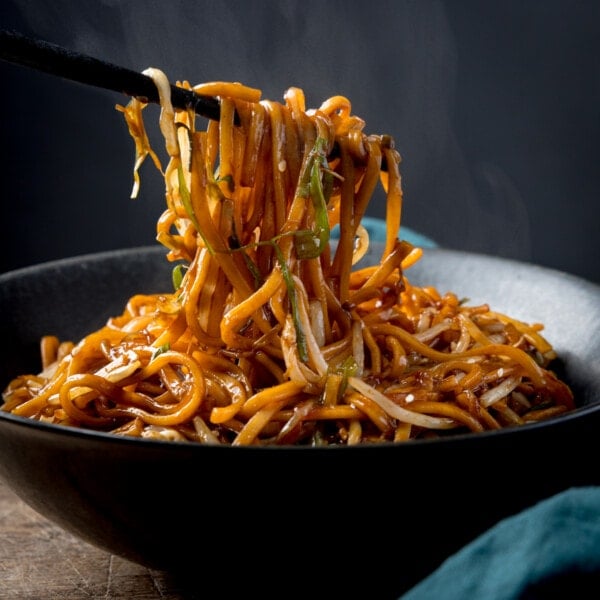
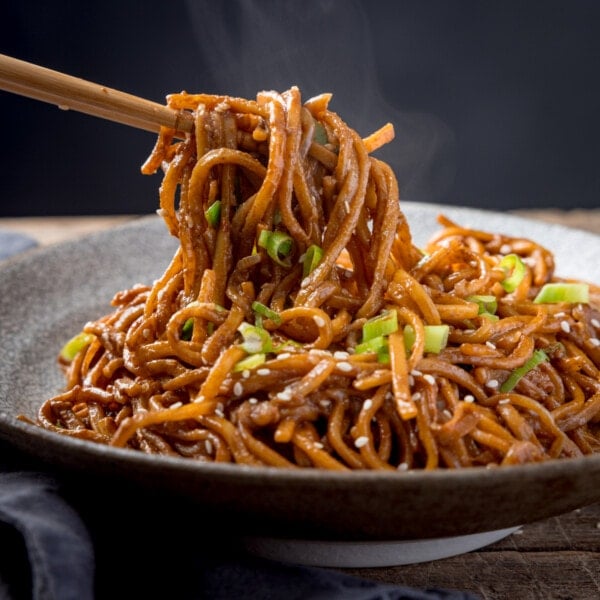
- Simple fried noodles or Sesame noodles
- With extra sides such as Sesame prawn toast or Spring rolls


📺 Watch how to make it
12 minute Sticky Asian Sea Bass
Ingredients
- 2 tbsp sesame oil
- 1 red chilli finely chopped
- 4 tbsp honey
- 2 tbsp dark soy sauce replace with tamari for gluten-free
- ½ tsp ground ginger
- 2 cloves of garlic peeled and minced
- 1 tbsp fresh lime juice (the juice from half a small lime)
- 4 sea bass fillets skin on
- ½ tsp cornflour/cornstarch
- 2 tbsp light brown sugar
To Serve:
- 1 handful of fresh coriander (cilantro) torn
- 1 bunch of spring onions (scallions) sliced into thin strips
- 1 red chilli sliced thinly
- slices of lime
Instructions
- Preheat the oven to 200C/400F (fan).
- Mix the oil, chilli, honey, soy sauce, ginger, garlic and lime in a small bowl.2 tbsp sesame oil, 1 red chilli, 4 tbsp honey, 2 tbsp dark soy sauce, 1/2 tsp ground ginger, 2 cloves of garlic, 1 tbsp fresh lime juice
- Place the sea bass fillets, skin-side down, on a baking tray. Sprinkle on the cornflour and rub it into the fish gently.4 sea bass fillets, 1/2 tsp cornflour/cornstarch
- Spoon on the honey-soy sauce mix (it will pour off a little, but that's fine). Sprinkle on the sugar and place in the oven to cook for 8 minutes. Halfway through cooking, open the oven and baste the fish with the sauce in the tray (it will be stickier now it's been in the oven).2 tbsp light brown sugar
- Once the fish is cooked, take it out of the oven and baste again with sauce, then sprinkle the top with coriander (cilantro), spring onion (scallion) strips, and slices of chilli.1 handful of fresh coriander (cilantro), 1 bunch of spring onions (scallions), 1 red chilli
- Serve with lime slices and some boiled rice or salad.slices of lime
Video
Notes
Skin on or skinless fillets?
Go for skin on fillets (boneless). The skin will help the flesh of the fish hold together better, and will ensure the fish is more tender.Spice Level
If you don’t like spicy-heat, leave out the chillies. If you’re cooking for mixed palates, make the glaze without the chillies. Divide into two and add chillies to one.Can I cook the sea bass in advance?
No, this really needs to be cooked right before serving, otherwise the fish will be chewy instead of tender and flakyYou can mix together the sauce ingredients beforehand (cover and leave at room temperature for up to a day) to speed things up even further when you make it.
Can I fry it instead?
Yes. Slash the skin of the sea bass two or three times, width-ways to help prevent the fish from curling when frying, then dust the fish with the cornflour (cornstarch).Heat a little oil in a frying pan and fry the fish over a medium-high heat for 4-5 minutes, skin-side-down first, until the skin is crisp. Then turn over and cook for 1 minute.
Transfer to a warm plate. Add all of the sauce ingredients to the pan and bubble together for a couple of minutes. Then pour over the sea bass and top with the same toppings.
Can I make it gluten free?
Yes, swap out the soy sauce for tamari and you’re good to go. Nutritional information is per portion.Nutrition
Nutrition information is automatically calculated, so should only be used as an approximation.
This sea bass recipe was first posted in March 2015. Updated since with new photos, video and tips and for housekeeping reasons.
🍲 More fantastic fish recipes


Some of the links in this post may be affiliate links – which means if you buy the product I get a small commission (at no extra cost to you). If you do buy, then thank you! That’s what helps us to keep Kitchen Sanctuary running. The nutritional information provided is approximate and can vary depending on several factors. For more information please see our Terms & Conditions.


This was amazing, thank you!!! Made me look like a pro and had fun slightly changing things – a student who otherwise cannot cook
Gem of a dish – deeeeeeelish and so quick and no fuss for a midweek munch after swimming. Restaurant quality taste. Served with noddles. I’m coming back for more recipes so excited to have found you 👍😋
Family favourite which I have passed onto my parents and they also love. I sometimes tinker with the recipe, adding fresh ginger or dried chilli flakes etc. Very yummy. Thanks for sharing.
I love this recipe made it many times it’s a great crowd pleaser, it looks so professional
“Put in the oven”, no temperature or gas mark…
Thankfully I can use my own common sense but you’re going to have newbs putting this in for 8 mins at 220 and others at 150… Completely different
Hi Ed, the full recipe card is at the bottom of the post with ingredient list and step-by-step instructions – including oven temp (step 1 – Preheat the oven to 200C/400F (fan).) and timings (step 4).