
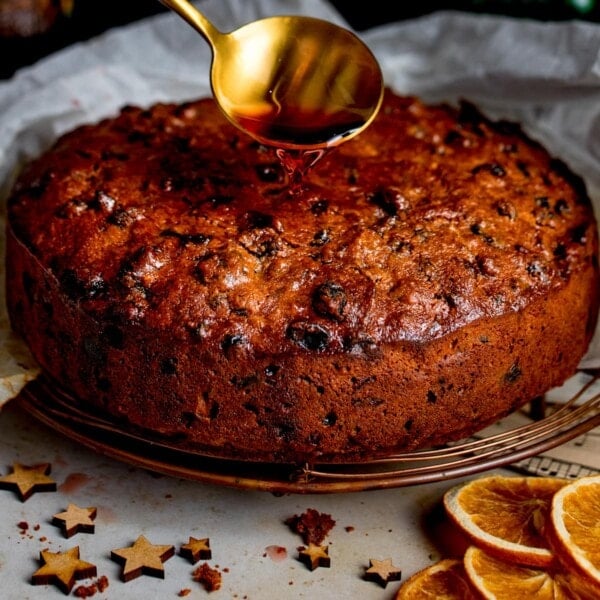
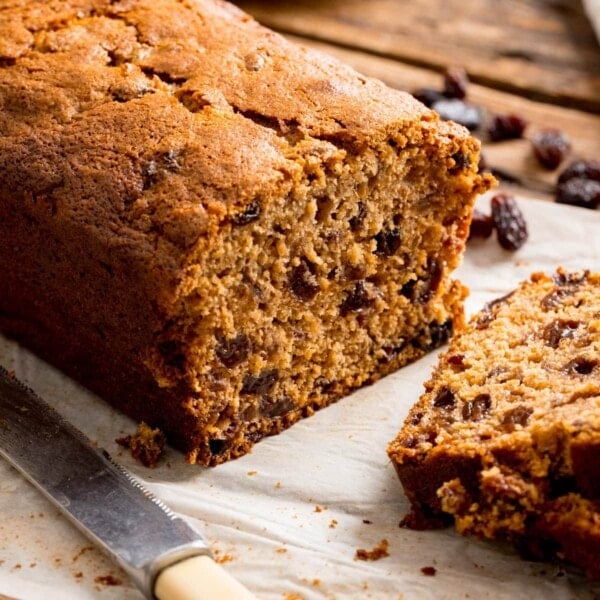
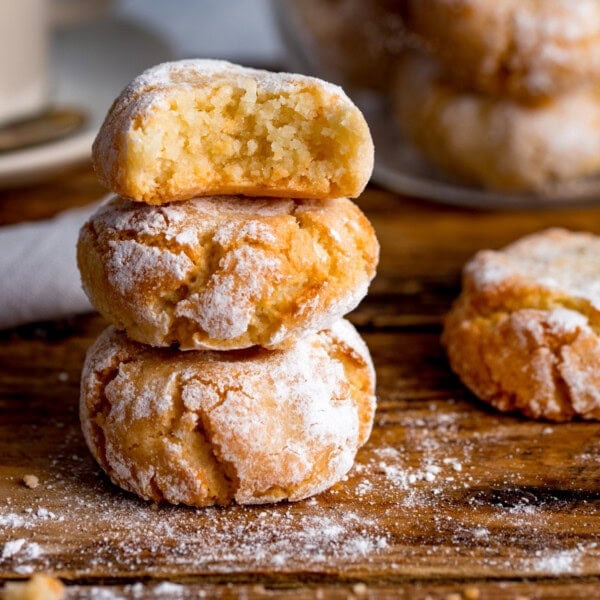
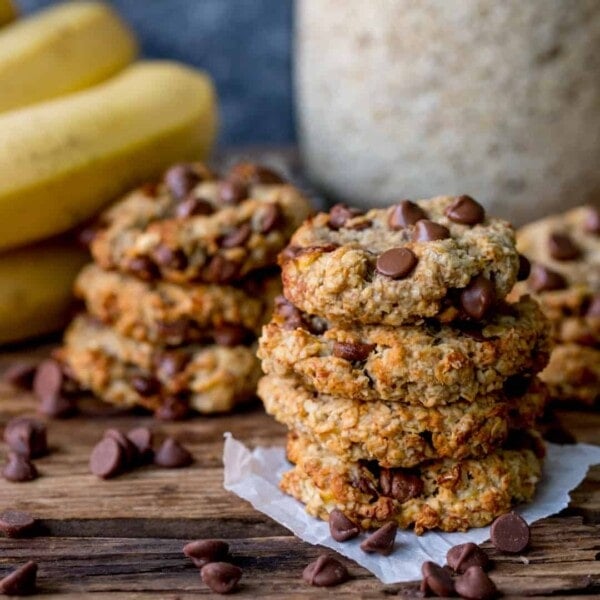
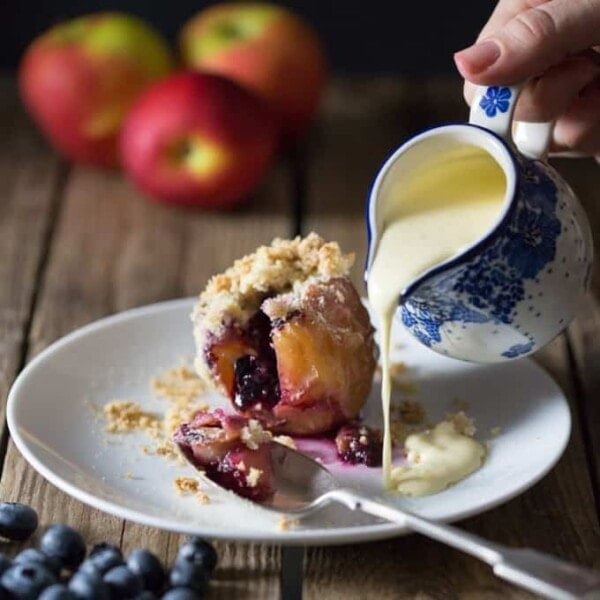
This post may contain affiliate links. Please read our disclosure policy.
Is there a better type of experiment than this cookie experiment? Sorry to all of you scientists out there, but I win. I’ve seen a lot of rules around cookie baking. The most common being that you MUST chill your dough before cooking, and you shouldn’t using completely melted butter. This got me thinking – does following certain cookie rules actually make a difference?
Well it turns out the answer is yes. Quite a significant difference actually.
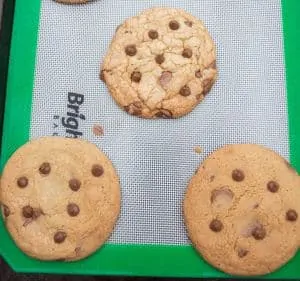
I baked over 80 cookies for this cookie experiment – and I probably ate at least 10% of those cookies 🙂
This experiment took a fair bit of prep, and pretty much a whole day of baking. So I decided to combine it with my last week at work and get my office friends involved in this taste test as part of my goodbye. My kids named themselves senior taste testers too, and took the job very seriously!! All-in-all I had 17 taste testers. I asked my volunteers to vote for their favourite cookie, and also to let me know their least favourite (although 4 people didn’t let me know their least favourite)
I used the recipe from my Classic Chewy Chocolate Chip Cookies post as my control recipe (which I originally got from Sally’s Baking addiction). This recipe calls for the following ingredients and rules:
Ingredients:
- 280g plain flour
- 1 tsp baking soda
- 1 and 1/2 tsp cornflour
- ½ tsp salt
- 170g unsalted butter almost fully melted (it’s better not to completely melt it as it can make the cookies greasy)
- 150g light brown muscavado sugar
- 100g granulated sugar
- 1 large egg
- 1 egg yolk
- 2 tsp vanilla extract (or vanilla paste)
- 180g good quality chocolate chips
Rules:
- Ensure your butter is very soft, but not completely melted
- Refrigerate the cookie dough for at least two hours
- Use a mix of brown and white sugar
- I also baked each cookie for exactly 12 minutes, with the exception of the ones I baked from frozen – I gave these 13 minutes.
(see the original cookie post for instructions on how to make)
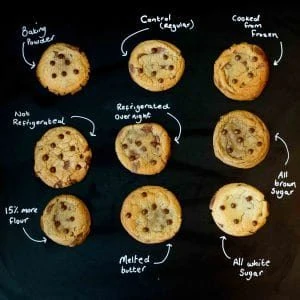
For the experiment, I made one simple change to each of the 8 further batches of cookies I made. These changes were:
- Replaced baking soda with baking powder
- Baked the cookie dough balls from frozen (i.e go through the refrigeration stage, roll the dough into balls, and then freeze)
- Baked the cookies without refrigerating the dough
- Baked the cookies after refrigerating overnight – rather than for 2 hours
- Used all brown sugar (i.e 250g brown sugar) rather than a mix of brown and white sugar
- Used 15% more flour (the idea behind this was to see if I’d get a thicker cookie)
- Used completely melted butter instead of very soft/almost melted butter
- Used all white sugar (i.e 250g white sugar) rather than a mix of brown and white sugar
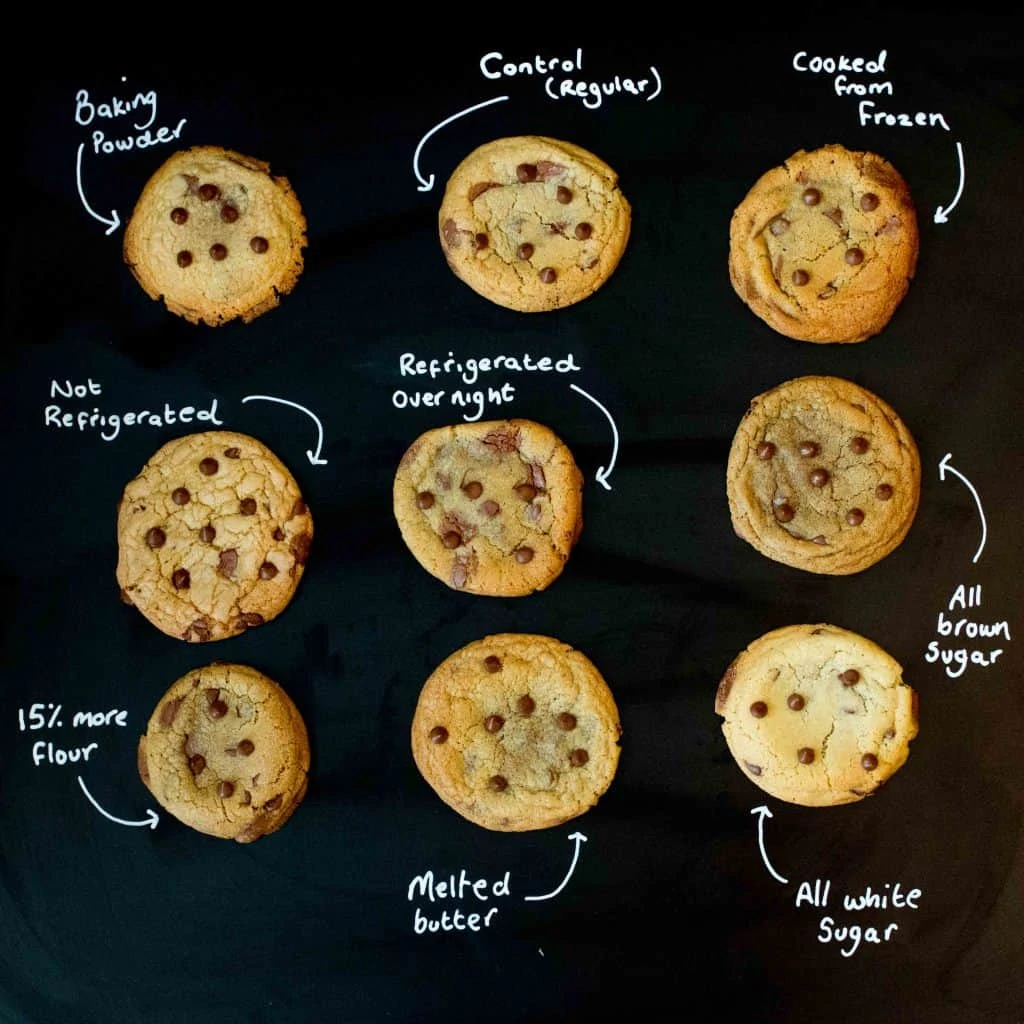
Here’s a close up and explanation of the results:
1. Replaced baking soda with baking powder:
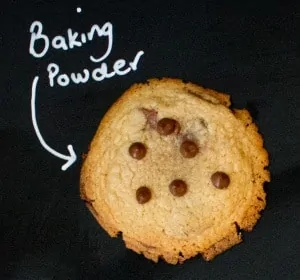
Replacing the baking soda with baking powder produced cookies that had a had a domed effect in the middle, with the outside edges being very flat and crunchy. They were still tasty cookies, but they weren’t chewy at all. 1 person voted for these cookies as their favourite.
2. Baked the cookie dough balls from frozen (i.e go through the refrigeration stage, roll the dough into balls, and then freeze)
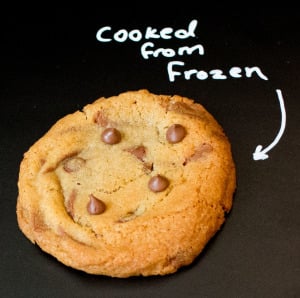
I admit, I cooked these cookies for 1 minute longer than the others, as I expected it to need longer with it being cooking from frozen. As it turns out, they don’t need longer. 12 minutes would have been just fine (I discovered this later – after further experimentation with a number of cookie dough balls that I decided to freeze for ’emergencies’). These cookies came out of the oven very puffed up and smooth. They sank a little during cooling and went a little rippled as they sank. These cookies had loads of flavour. They were crunchy on the outside and chewy in the middle. 2 people voted for these cookies as their favourite.
3. Baked the cookies without refrigerating the dough
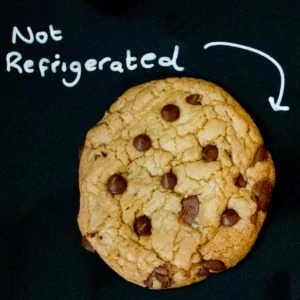
These cookies, although quick to make, were definitely the worst by far. They were firm, crumbly, had a very cracked appearance on top, and a bit of a strange looking shine to them. There was no depth of flavour to these cookies. It was also much harder to shape them into balls before baking. When you refrigerate your cookie dough, it goes a lot firmer, enabling you to mould the cookie dough into a ball in your hands. If you don’t refrigerate, you’re dealing with a sloppy batch of cookie dough. This meant my hands were sticky, and the dough was basically splodged onto the baking mat. In an attempt to make these ones easier to handle, I also wet my hands before trying to form a couple of them into balls. Interestingly, I found that doing this meant that the resulting cookies didn’t have the cracked, shiny appearance. However, they still tasted bland. You can see on this picture that the top cookie was formed with dry hands, and the bottom two were formed using wet hands. 1 person voted for these cookies as their favourite. 11 people voted for these cookies as their least favourite.
4. Baked the cookies after refrigerating over night – rather than for 2 hours
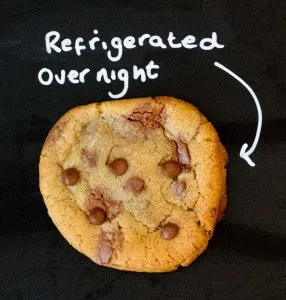
These cookies were soft and chewy with lots of flavour. Not much else to say! 5 people voted for these cookies as their favourite. 1 person voted for these cookies as their least favourite.
5. Used all brown sugar (i.e 250g brown sugar) rather than a mix of brown and white sugar
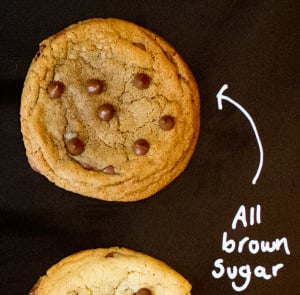
Definitely one of my favourites. These cookies had a real caramel flavour, they were chewy on the inside, crisp on the outside and were very tasty. The brown sugar produced a darker appearance than the other cookies. 4 people voted for these cookies as their favourite.
6. Used 15% more flour
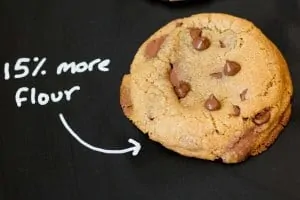
Using more flour produced a thicker cookie that spread less during baking. They were a little drier than the control cookie. They had less flavour, and a slight floury/cloying texture. Visually, they were probably the most appealing during to their puffy, thick appearance. 2 people voted for these cookies as their favourite.
7. Used completely melted butter instead of very soft/almost melted butter
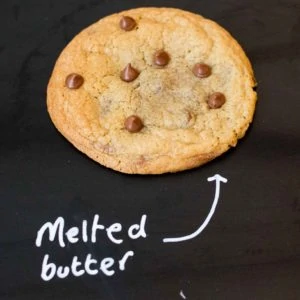
These cookies were tasty and very soft on the inside. They did have slightly more of a greasy texture than the control. They also spread more during baking than any of the other cookies. 1 person voted for these cookies as their favourite.
8. Used all white sugar (i.e 250g white sugar) rather than a mix of brown and white sugar
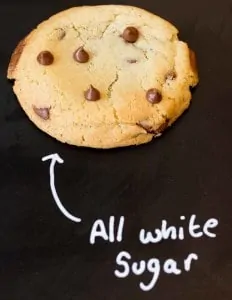
These cookies were reasonably thick and very pale looking. They were chewy and soft, although they were quite dry at the edges. As expected, they had less of a caramel flavour than the control cookies. No-one voted for these cookies as their favourite.
Finally, here’s the control cookie
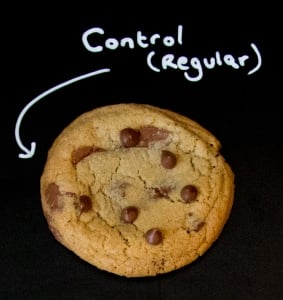
An all round, tasty, soft, chewy cookie. 1 person voted for these cookies as their favourite. 1 person voted for these cookies as their least favourite.
Conclusion:
The overall favourite from the taste experiment was cookie number 4 (where the cookie dough had been refrigerated overnight). The overnight refrigeration really allowed those flavours to fully develop. Cookie 5 (all brown sugar) came a close second.
Based on these results (and if you like a very flavoursome, soft and caramelly cookie) it may well be worth making your cookies using only brown sugar, and refrigerating the dough overnight.
For me, I’ll also be ensuring I have a good stock in the freezer so I can put one in the oven whenever the craving strikes!
What do you think? Have you done any similar experimentation? Which one do you think you’d choose as favourite?
As a reminder, here’s the basic control recipe (however the experiment results suggest you use just brown sugar instead of a mix of brown and white, and also chill the mixture overnight or cook the dough balls from frozen):
The Cookie Experiment Recipe:
Cookie Experiment
Ingredients
- 280 g (2 1/3 cups) plain (all-purpose) flour
- 1 tsp baking soda
- 1 ½ tsp cornflour
- ½ tsp salt
- 170 g (3/4 cup + 1 tsp) unsalted butter almost fully melted it’s better not to completely melt it as it can make the cookies greasy
- 150 g (3/4 cup) light brown muscavado sugar
- 100 g (1/2 cup) granulated sugar
- 1 large egg
- 1 egg yolk
- 2 tsp vanilla extract or vanilla paste
- 180 g (1 cup + 1 tbsp) good quality chocolate chips
Instructions
- In a bowl, mix together your flour, baking soda, cornflour and salt. Set aside.280 g (2 1/3 cups) plain (all-purpose) flour, 1 tsp baking soda, 1 1/2 tsp cornflour, ½ tsp salt
- In a large bowl, whisk together the butter and the two sugars until thoroughly combined.170 g (3/4 cup + 1 tsp) unsalted butter almost fully melted, 150 g (3/4 cup) light brown muscavado sugar, 100 g (1/2 cup) granulated sugar
- Add the egg, egg yolk and vanilla extract and whisk again until combined. Add the flour mixture and mix together using a wooden spoon.1 large egg, 1 egg yolk, 2 tsp vanilla extract
- Finally pour in your chocolate chips, reserving 1 tbsp of them to put on top later. Mix everything together so you get an even distribution of chocolate chips.180 g (1 cup + 1 tbsp) good quality chocolate chips
- Then place some clingfilm over the bowl and chill in the refrigerator for at least 2 hours (and up to 3 days). It’s very important to chill the dough, so you don’t get flat cookies that spread all over your baking tray upon baking.
- When you’re ready to bake the cookies, pre-heat the oven to 160C/325F (fan).
- Line 3 large baking trays with baking parchment or a silicone baking mat.
- Take the cookie dough out of the refrigerator and scoop out a heaped tablespoon full (you may want to weigh out the dough to get even sized cookies. 2 oz/55g of dough makes a good sized cookie. You’ll get about 16-18 cookies out of this). Roll the dough into a ball with your hands, and place on you baking sheet. Repeat until you have used all of the dough. Make sure your dough balls are a good distance apart on the baking sheet as they will spread. I tend to put 6 or 7 cookies on each baking sheet.
- Place in the oven and cook for 10-13 minutes, depending on whether you like your cookies soft and chewy or a bit more crisp.
- Take out of the oven and push the reserved chocolate chips gently into the hot cookies. Leave to cool on the baking tray for 10 minutes before gently lifting off with a spatula and cooling completely on a cooling rack.
Notes
Nutrition
Nutrition information is automatically calculated, so should only be used as an approximation.


Hi I have tried so many of your recipes and they have turned out absolutely amazing but this one I have tried 4 times and I cannot make them. They look great in the oven big and round but whin I take them out and let them cool they just flatten and go thin. When I try and move them they fall apart all gooey . I give up on this one
Good experiment
My problem was I left out part of the butter & was trying to figure out how to make it work had to make cookie balls & put powered sugar on them do not know how they will taste to my family I am calling them snowballs . The dough was falling art so I added oil so they would stay together .
Next time you need help with tasting of recipes I’m volunteering my services😋
Hey I was wondering, what if you had tried it and tested out what milk would be the best in the cookie?
Hi Amber, no sorry, I don’t use milk in my cookie recipes, so I haven’t tried this.
i have always been a big believer of chilling cookie dough for the crispier exterior and soft chewy interior, to me, a good cookie is worth the wait, thanks for confirming mad food scientist:)
Ha Ha no problem! This is my kind of experiment 🙂
Try experimenting with different types of butter… european style verses unsalted and adding a little salt. Also different levels of browning the butter or 1/2 brown butter 1/2 unsalted regular. Takes the cookies to a whole level. Different percentages of chocolate and chocolate quality. 😉
ooh I like it! Thanks for the ideas Donna. I might have to get a regular experimentation slot going on the blog I think – so much fun!
I remember experimenting last year with part oil part butter, and a mix of brown and raw sugar. The part oil and butter cookies turned out slightly crisper and kept longer, but was somewhat greasier. The raw sugar was interesting but not quite to my liking ha.
Interesting JT, sounds like the same results as with the ones I did with the melted butter. I didn’t think of the added benefit of them lasting longer. Although, I’ve got to admit, I’m too greedy to leave them for long anyway 🙂