Artisan Bread Recipe
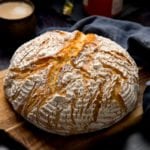
A delicious Artisan bread with a crispy crust and a soft interior. I'll show you how to get that craggy crust with or without a Dutch oven.
Servings: 12 slices
Ingredients
- 7 g (2 tsp) instant yeast
- 5 g (1 tsp) sugar caster or superfine
- 300 ml (1 1/4 cups) warm water slightly warmer than lukewarm, but not hot
- 450 g (3 3/4 cups)plain (all-purpose) flour PLUS 1/2 cup (60g) for dusting and shaping the bread
- 8.5 g (1 1/2 tsp) salt (regular table salt/Kosher salt)
Instructions
- Add the yeast, sugar, and warm water to the bowl of your stand mixer, or to a large bowl. Leave for 5 minutes, until the yeast starts to foam.7 g (2 tsp) instant yeast, 5 g (1 tsp) sugar, 300 ml (1 1/4 cups) warm water
- Add the flour, then the salt. Mix together using the dough hook attachment on your stand mixer, or mix together with your hands until fully combined.450 g (3 3/4 cups)plain (all-purpose) flour, 8.5 g (1 1/2 tsp) salt
- Using the dough hook, knead the dough on a medium setting for 10 minutes. If you want to do this with your hands, oil the work surface and your hands with a little olive or vegetable oil, and knead for 10 minutes. It will be a sticky dough - this is fine.
- Once kneaded, place the dough in an oiled bowl (wiped with a little olive or vegetable oil). Cover with clingfilm or a wax wrap and prove for 1 hour - until doubled in size.
- Sprinkle the work surface with 1/4 cup (30g) flour and tip the dough out onto the flour. You'll probably need to use your hands to tease it out of the bowl, as it will still be quite sticky. Sprinkle with a tablespoon of the flour.
- We DON'T want to knock the air out of the dough at this point. We simply want to shape the dough by grabbing a piece from the outside and pulling it into the middle.
- Continue this, pulling the dough in all the way around until the dough no longer wants to stick in place (see the video for a visual on this). You may need a little more flour to prevent it sticking.
- Then turn the dough over and use your hands just to finish off rounding it out.
- Place the dough in a well-floured proving basket or floured bowl - SEAM-SIDE-DOWN.
- Cover with clingfilm or a wax wrap and prove for 30 minutes.
- Meanwhile, place a dutch oven (approx 25cm/10" diameter) in the oven and preheat the oven to 230C/450F (fan).
- When the dough has finished its second prove, remove the cover, take a long piece of parchment or greaseproof paper and place it on top of the bowl.
- Gently tip the bowl upside-down the dough ends up on the paper.
- Very carefully take the hot Dutch oven out of the oven and remove the lid (leave a tea towel on top of the lid, so you don't forget it's hot and grab the lid without thinking).
- Use the edge of the baking parchment to carefully lower the bread into the Dutch oven. Place the lid on top and carefully place back in the oven.
- Bake for 30 minutes, then remove the lid and bake for a further 10-15 minutes until golden brown.
- Remove from the oven and allow to cool completely on a cooling rack before slicing and serving.
Video
Notes
Can I prove it overnight?
Yes, do the first prove covered, overnight, in the refrigerator, then remove from the fridge, shape and do the final 30-minute prove at room temperature (ensure it's a warm room or warm area of the room) before baking.
Can I skip the kneading process?
Kneading really helps the gluten development, which will make the bread softer and with a better rise and more 'spring'.
If you don't want to knead the dough, you'll need to prove the dough overnight (rather than for an hour) to give the gluten more time to develop.
See instructions above for proving overnight. How long will it last?
The bread tastes at it's best if eaten in the first 24 hours.
If you know the whole loaf is going to be eaten quickly (within 10 hours or so) there's no need to cover the bread. Just place on the chopping board cut-side down (presuming you've already cut into it). This will help to keep the crust nice and crispy. If you know you want to make the bread last until the next day, then wrap in foil once cooled and store are room temperature.
The bread will still be good for up to 2 days, but it gets less soft after 1 day. Can I freeze this bread?
Yes, once cooled, slice the bread and freeze, then defrost individual pieces at room temperature. Can I use regular active dry yeast or fresh yeast instead of instant yeast? Yes:
Replace the 2 tsp (7g) instant yeast with 2.5 tsp (9g) active dry yeast.
OR
Replace the 2 tsp (7g) instant yeast with 2tbsp (18g) of fresh yeast. Why are you not using bread flour? I find that plain (all-purpose) flour gives a slightly thinner but crustier exterior than bread flour. This gives it more of an artisan feel.
Bread flour has a higher protein content, - which makes the dough more springy and chewy, with a thicker, chewier crusty. You can replace with bread flour if you prefer. If you do, you'll need to add about 2.5-3 tbsp more water - as the bread flour absorbs more water. Nutritional information is per slice (approx 12 slices in this bread).
Nutrition
Calories: 156kcal | Carbohydrates: 33g | Protein: 5g | Fat: 1g | Saturated Fat: 1g | Sodium: 293mg | Potassium: 54mg | Fiber: 1g | Sugar: 1g | Calcium: 6mg | Iron: 2mg