
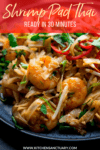
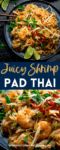
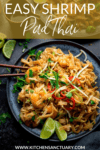
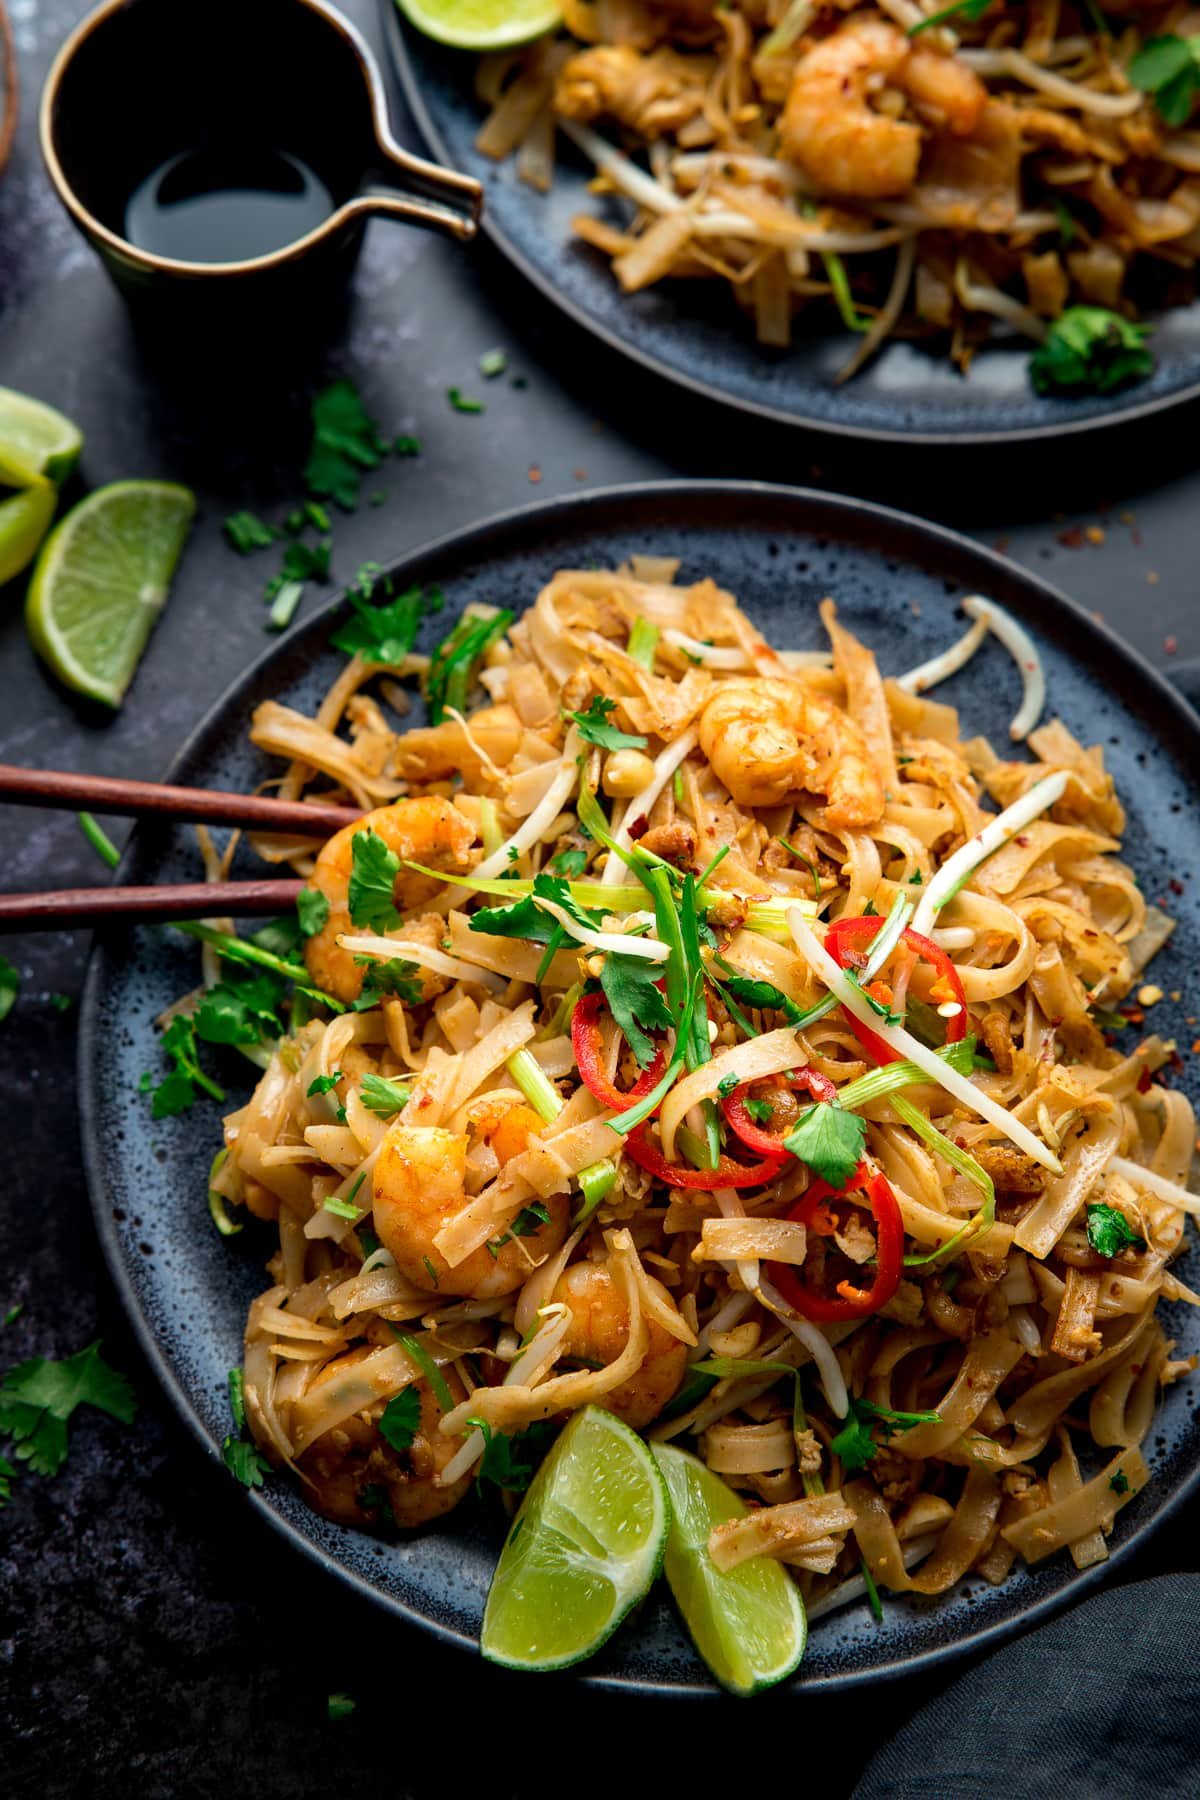
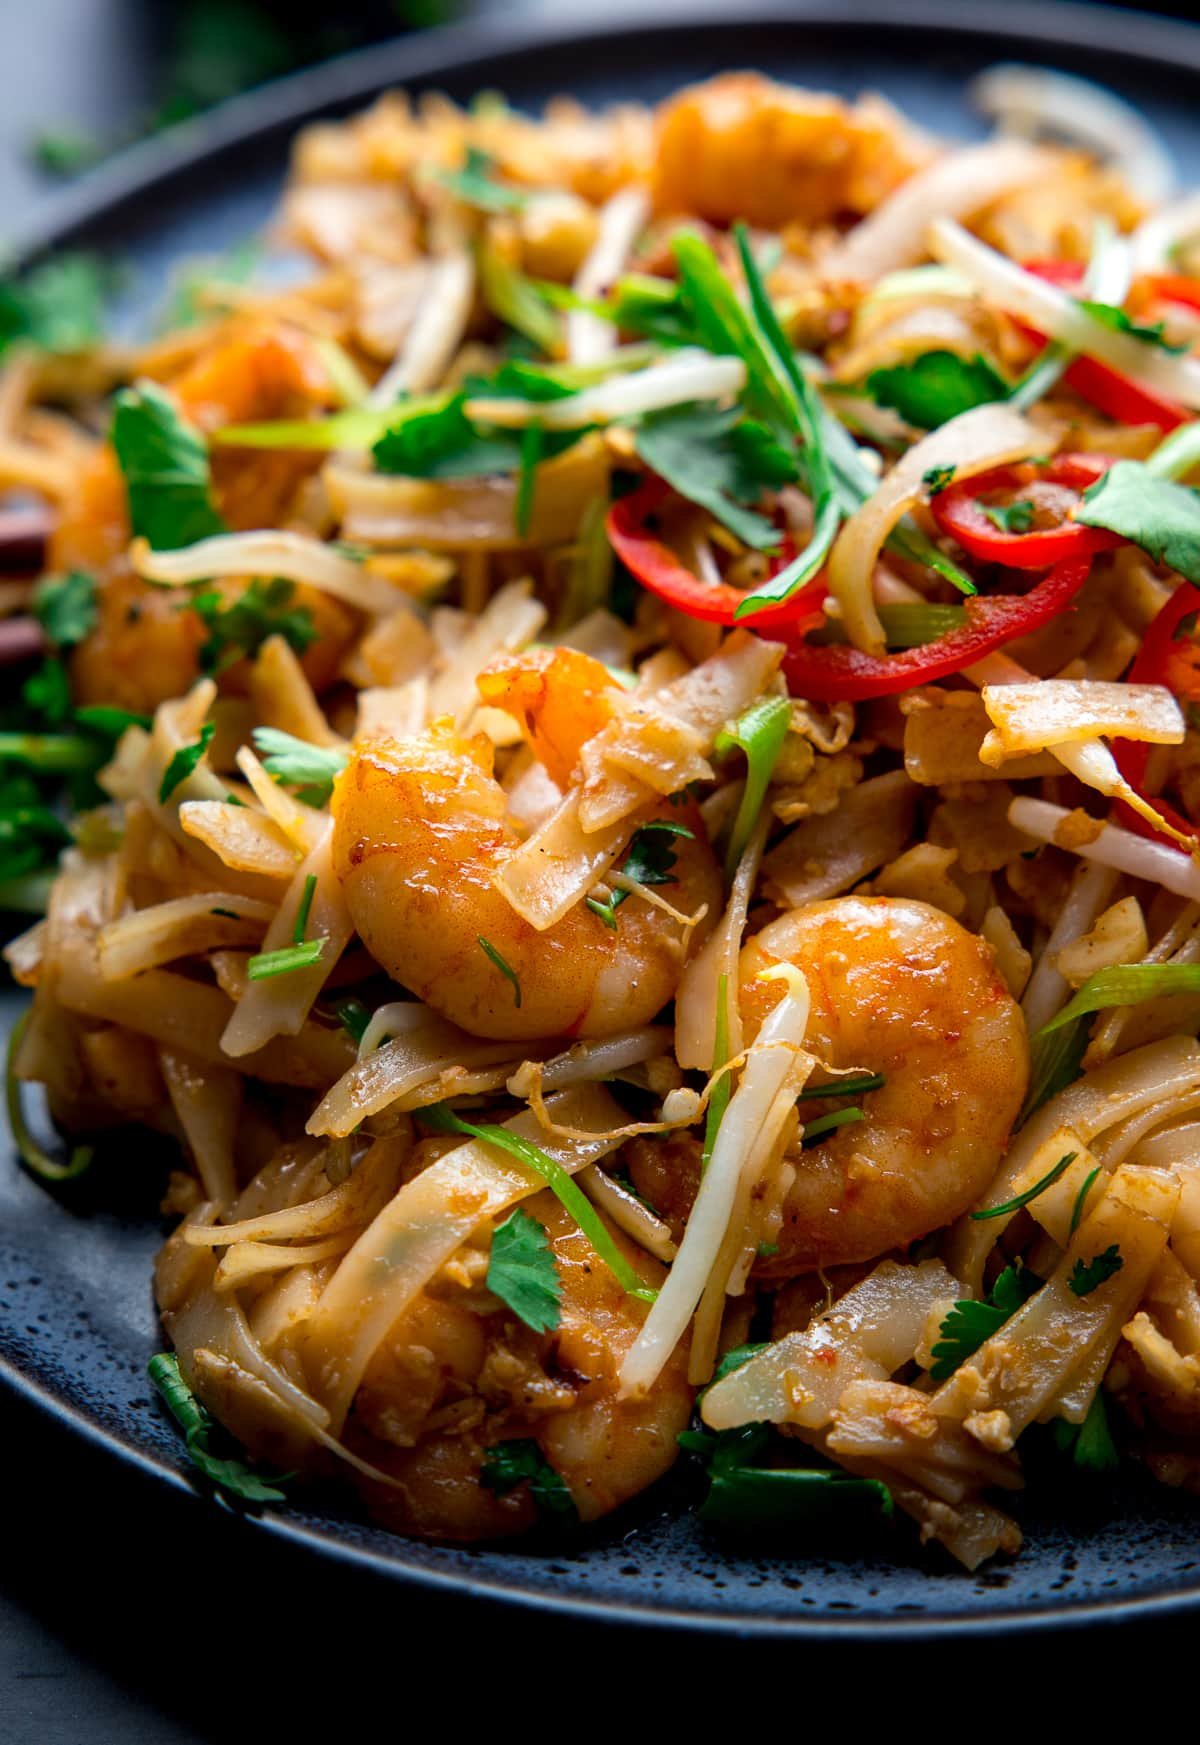
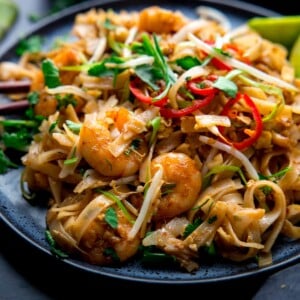
Juicy king prawns and tiny little shrimp all fried together with rice noodles in a sweet and spicy sauce. Finished off with crunchy peanuts, fresh coriander and a squeeze of tangy lime, this Pad Thai combines BIG flavours to make a lip-smackingly tasty dinner that you can pull together in 30 minutes.
Just like your favourite Thai restaurant or that awesome food truck – this recipe is one to make the taste buds tingle!
I nearly always order Pad Thai when we go to a Thai restaurant. I love those tangy noodles and big prawns, and being someone who LOVES toppings, a Pad Thai is probably the most toppings-heavy item on the menu.
We’re usually talking crushed peanuts, fresh coriander, wedges of lime, fresh chillies and maybe a sprinkling of dried chillies too. Just give me all the toppings.
What is Pad Thai?
Originating from Thailand, Pad thai (also called phad thai), is a popular street food dish of stir-fried flat rice noodles. The noodles are flavoured with tamarind, shrimp paste, chillies, fish sauce, sugar and lime. Common additions include eggs, tofu, prawns, chopped peanuts, bean sprouts and pickled radishes.
I love the layer-upon-layer of flavours in a Pad Thai – as well as the abundance of toppings to finish the whole thing off.
What do we need?
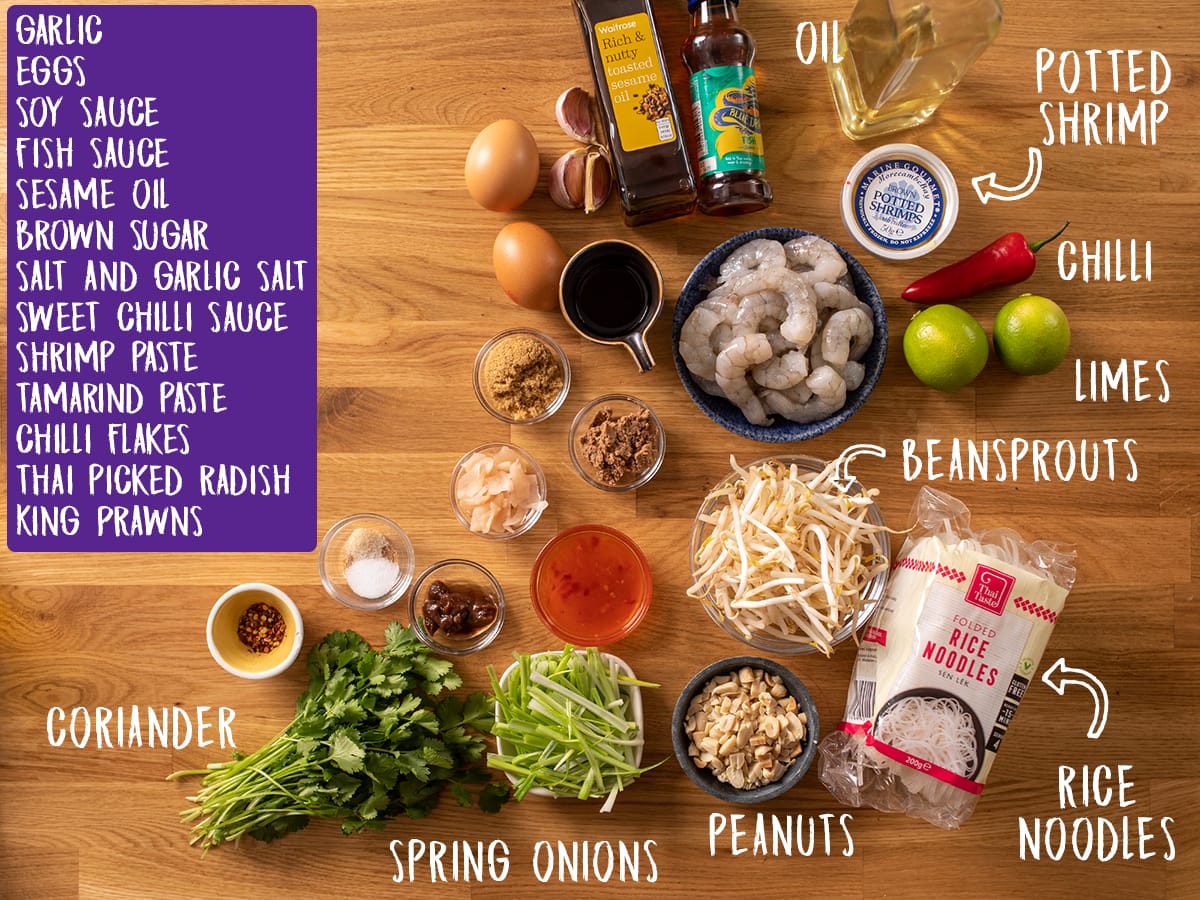
It’s really important to get the right noodles in a Pad Thai. Skinny noodles or egg noodles just won’t do it.
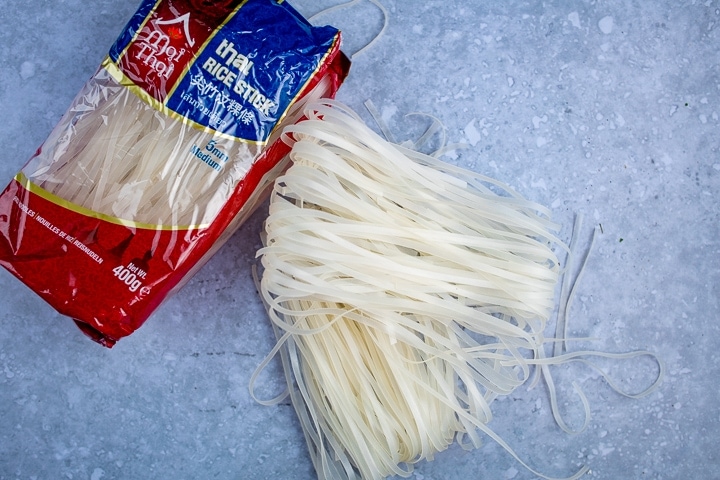
The noodles:
The best noodles for Pad Thai are flat rice noodles or ‘rice sticks’ that are around 3-5mm wide. Thai Taste and Mai Thai noodles are a good choice.
Rice noodles are notorious for sticking together, so I recommend soaking the noodles in a pan of just-boiled water for 3-4 minutes. Then drain them and run them under cold water to stop the cooking process. Add a teaspoon of sesame oil or an unflavoured oil, such as vegetable or rapeseed oil, and toss together. I also use these noodles in my Beef Chow Fun.
The tiny shrimp:
In addition to king prawns, I like to add tiny brown shrimp to my Pad Thai.
You can go down the traditional route of frying up dried shrimp, and then use the frying oil to flavour your Pad Thai. However I find the dried ones a little too pungent. Brown shrimp (also known as crangon crangon) are a lovely tender alternative. They’re widely available in the UK in little pots with butter. That’s what I’m using for this recipe.
Ingredient swaps/additions
- Add in fried cubes of firm tofu that have been seasoned with a little salt.
- Add cooked chicken or crab
- Swap out spring onions for garlic chives. Garlic chives are more authentic than spring onions, but can sometimes be harder to get hold of.
- Swap out the potted shrimp with the more authentic dried shrimp (I find dried shrimp a little too chewy and pungent, but some people love that distinctive taste). Replace the potted shrimp with 30g (1 oz or 3 tbsp) of dried shrimp and add an extra 1 tablespoon of vegetable oil when frying them up.
How to make it
- Once you’ve fried up the shrimp with the butter, oil, salt and a little garlic salt, they’re removed with a slotted spoon – leaving that lovely flavoured oil behind. The king prawns are then fried in this oil with garlic and chilli flakes.
- Next in goes eggs, followed by cooked noodles, fish sauce, tamarind paste, chilli sauce, sugar, shrimp paste and soy sauce.
- Once that’s mixed together and heated through, we finish off with Thai preserved radish, crushed peanuts, spring onions (scallions), bean sprouts and coriander (cilantro).
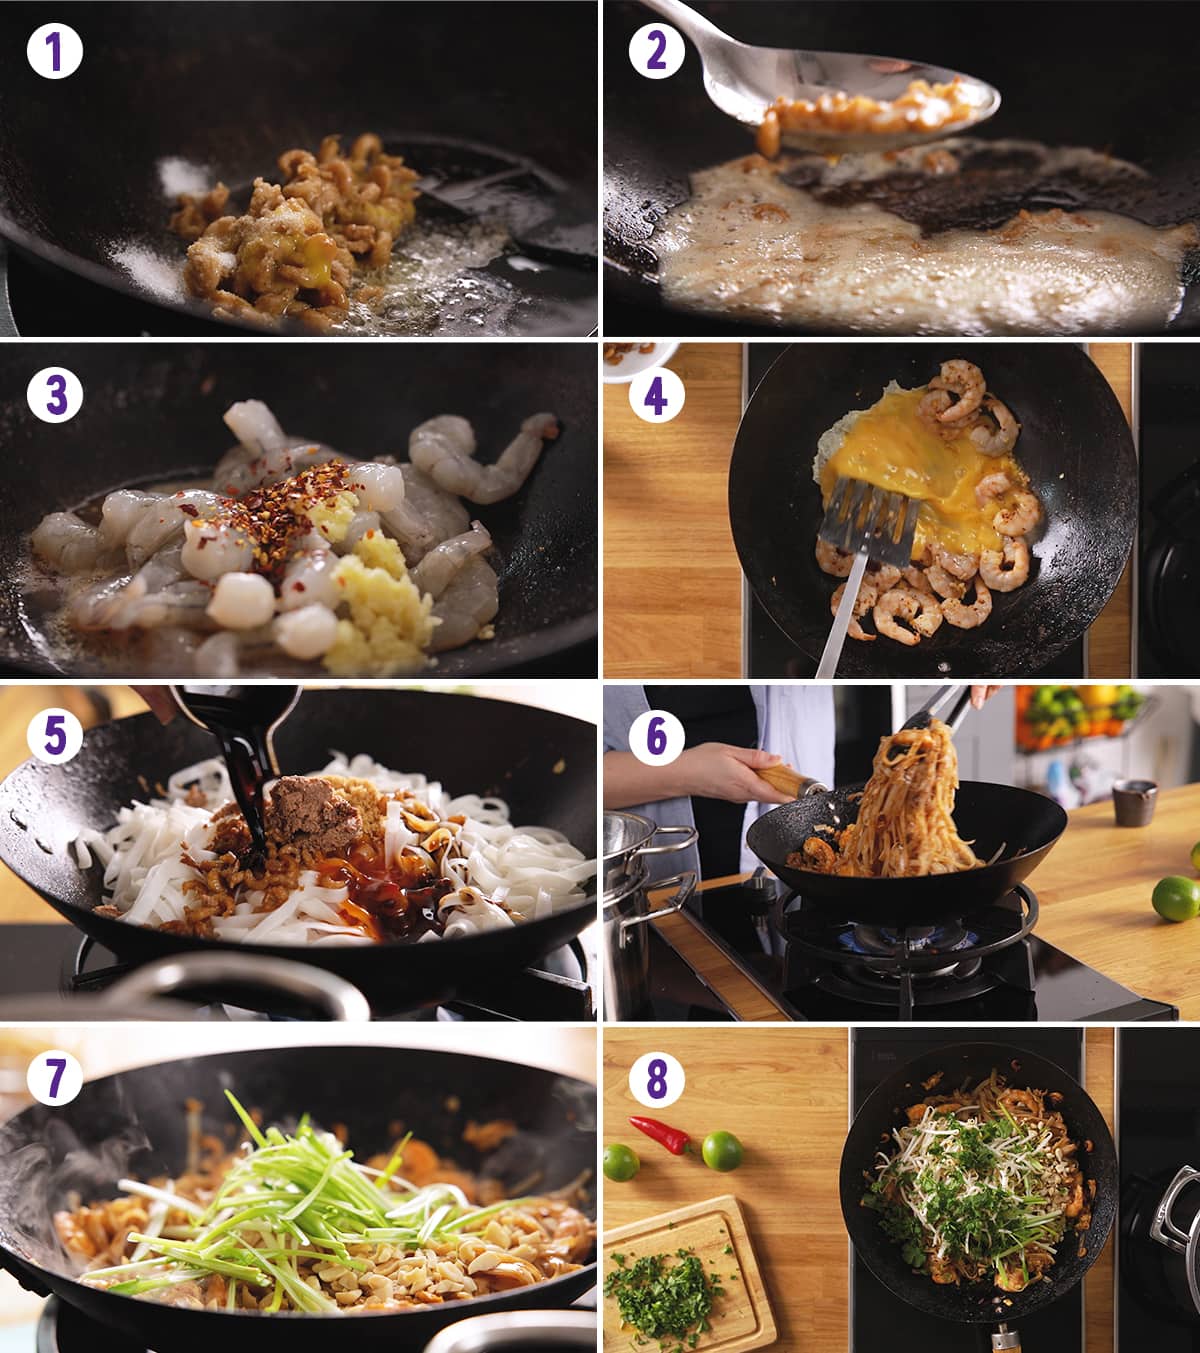
- Toss it all together and serve.
- Top with some sliced red chilli and lime wedges . I also like to finished with a few more chopped nuts, fresh coriander and chilli flakes.
Easy Pad Thai! A fair few ingredients, but simple to put together and so delicious!
Is Pad Thai fishy?
Authentic Pad Thai does tend to be on the fishy side – mostly from the addition of fish sauce and shrimp paste. Shrimp paste is rather pungent, but it does mellow a little as you cook it. How fishy a Pad Thai is generally depends on how much shrimp paste and fish sauce is added.
I add in 2 tsp of shrimp paste and 2 tbsp of fish sauce – which is enough to give it that addictive umami tang and to add to that distinctive Pad Thai taste, but without it being overly fishy-tasting.
Try some of my other Thai recipes:
Thai green curry, Thai red curry or Thai yellow curry – all made with homemade curry paste
Thai fishcakes with vegetable ribbons
Thai chicken salad with peanut dressing
Thai style Peanut Pork
Thai fish burgers with sweet chilli sauce
Or more Prawn Recipes:
Prawn and Mango noodle curry bowl
Thai prawns with cauliflower rice
Chicken, Chorizo and Prawn Jambalaya
Coconut Prawns with Fiery Tomato Dip
Chris’s AMAZING Prawn Toast Recipe
Watch how to make it:

Stay updated with new recipes!
Subscribe to the newsletter to hear when I post a new recipe. I’m also on YouTube (new videos every week) and Instagram (behind-the-scenes stories & beautiful food photos).
Pad Thai Recipe
Ingredients
- 175 g (6 oz) dried 5mm-wide flat rice noodles
- 1 tsp sesame oil
- 50 g (1.75 oz) pot of potted brown shrimp (the teeny tiny shrimp in butter) * (see note 1)
- 1 ½ tbsp vegetable oil
- ¼ tsp salt
- pinch garlic salt
- 20 large raw king prawns peeled and de-veined
- 3 cloves garlic peeled and minced
- ½ tsp dried chilli flakes
- 2 eggs beaten
- 2 tbsp fish sauce
- 1 tsp tamarind paste
- 2 tbsp sweet chilli sauce
- 1 tbsp soft brown sugar
- 2 tsp shrimp paste
- 2 tbsp dark soy sauce or tamari for gluten-free
- 1 tbsp Thai preserved radish chopped (optional)
- 40 g (1/3 cup) roasted peanuts coarsely chopped
- 4 spring onions (scallions) halved, then finely sliced lengthways
- 100 g (3.5 oz) fresh bean sprouts (mung bean sprouts)
- 2 tbsp roughly chopped coriander/cilantro
To Serve:
- 2 limes sliced into wedges
- 1 fresh red chilli sliced
- extra chopped coriander/cilantro spring onions, chopped peanuts and chilli flakes
Instructions
- Boil a large pan of water and add the noodles. Turn off the heat and leave to stand for 3-4 minutes. Drain, then rinse with cold water until cold. Drizzle on the sesame oil and toss together – to prevent the noodles from sticking.175 g (6 oz) dried 5mm-wide flat rice noodles, 1 tsp sesame oil
- Heat a large wok over a high heat. Add the potted shrimp in butter, vegetable oil, salt, and garlic salt. Fry for 2-3 minutes until lightly golden.50 g (1.75 oz) pot of potted brown shrimp (the teeny tiny shrimp in butter), 1 1/2 tbsp vegetable oil, 1/4 tsp salt, pinch garlic salt
- Remove the shrimp with a slotted spoon and place in a bowl – leaving the oil in the wok.
- Add the king prawns, garlic, and dried chilli flakes to the oil in the wok. Fry for 2-3 minutes until the king prawns just start to turn pink.20 large raw king prawns, 3 cloves garlic, ½ tsp dried chilli flakes
- Whisk the eggs together and add to the prawns.2 eggs
- Fry, stirring often with a spatula until the eggs are just scrambled.
- Turn down the heat to medium and add the noodles, potted shrimp, fish sauce, tamarind paste, sweet chilli sauce, sugar, shrimp paste, and soy sauce/tamari.2 tbsp fish sauce, 1 tsp tamarind paste, 2 tbsp sweet chilli sauce, 1 tbsp soft brown sugar, 2 tsp shrimp paste, 2 tbsp dark soy sauce
- Toss everything together, heating for about 5 minutes, until the noodles are hot. Keep the noodles moving around the wok to stop them sticking, and ensure any pieces of shrimp paste are broken up.
- Add the preserved radish, peanuts, spring onions (scallions), beansprouts, and coriander (cilantro).1 tbsp Thai preserved radish, 40 g (1/3 cup) roasted peanuts, 4 spring onions (scallions), 100 g (3.5 oz) fresh bean sprouts (mung bean sprouts), 2 tbsp roughly chopped coriander/cilantro
- Toss together and cook for a further 1-2 minutes, until the beansprouts are just heated through.
- Serve with lime wedges and top with fresh red chillies. You can also sprinkle on extra coriander/cilantro, spring onions, chopped peanuts, and chilli flakes if you like.2 limes, 1 fresh red chilli, extra chopped coriander/cilantro
Video
Notes
Quickly cool, cover and refrigerate (for up to a day) any leftovers. The best way to reheat is covered, in the microwave. Sprinkle with a couple of tablespoons of water, then reheat in 30 second bursts on the highest heat. Every 30 seconds agitate the noodles a little with a fork or some chopsticks. Continue to heat until piping hot throughout, which should take 3-5 minutes per portion. Can I freeze it? As per the info above, Pad Thai tastes much better when fresh. However you can freeze leftovers. Quickly cool, cover and freeze leftovers. Defrost in the refrigerator overnight and reheat as per the reheat instructions in the ‘Can I make it ahead?’ question above. Pad Thai Sauce: The noodles are coated in a number of different ingredients. I add these in one at a time, but you can stir them together to make a sauce, and pour it directly on the noodles during cooking if you prefer.
The sauce would include:
- Garlic
- Dried chillies
- Fish sauce
- Shrimp paste
- Tamarind paste
- Chilli sauce
- Sugar
Swap the fish sauce in this case for a vegetarian fish sauce (Thai Taste do one) or soy sauce/tamari.
It’s difficult to replace the shrimp paste, but I’ve heard that a good alternative is miso paste – as it’s got that nice salt, umami flavour. Can I scale this recipe up or down? Scaling down: You can halve the recipe to make it for two people by halving all of the ingredients and cooking in the same way. Scaling up: You can double the recipe to make it for up to 8 people by doubling all of the ingredients. It will take a little longer to cook everything through and you will have to be careful when frying the noodles in the wok as the longer cooking time can cause the noodles to break up if they’re agitated in the wok too much. Recipe inspiration: This recipe is inspired by Rick Stein’s Pad Thai recipe from his book Far Eastern Odyssey. Nutritional Information is approximate and is per portion.
Nutrition
Nutrition information is automatically calculated, so should only be used as an approximation.
This post was first published in July 2019. Updated in July 2020 with new photos, tips and video.
Some of the links in this post are affiliate links – which means if you buy the product I get a small commission (at no extra cost to you). If you do buy, then thank you! That’s what helps us to keep Kitchen Sanctuary running. The nutritional information provided is approximate and can vary depending on several factors. For more information please see our Terms & Conditions.


OMGOODNESS, you have made my mouth water with your incredible photos and dishes. Im really looking forward to trying some of them. They honestly sound amazing.. thankyou ❤️