I’ve not been hugely successful with making cake pops so far. The pops themselves are pretty tasty, but the finished product generally looks like a 5 year old has be let loose with her art box…
So whilst satisfying my need for a sweet, carby accompaniment to my cup of tea, I thought I’d have a go at making mini (and regular sized) frosted buns.
I’d spotted a similar pastry version and pinned it to one of my Pinterest boards, so I’ve been looking forward to having a go myself.
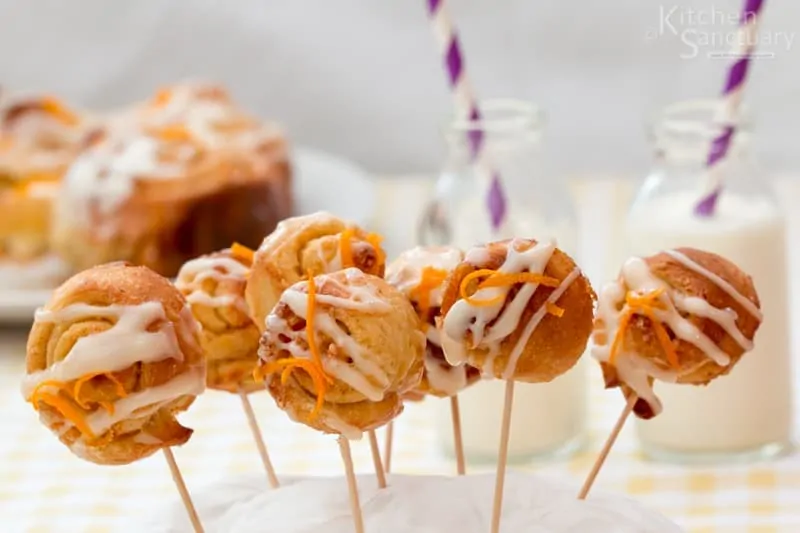
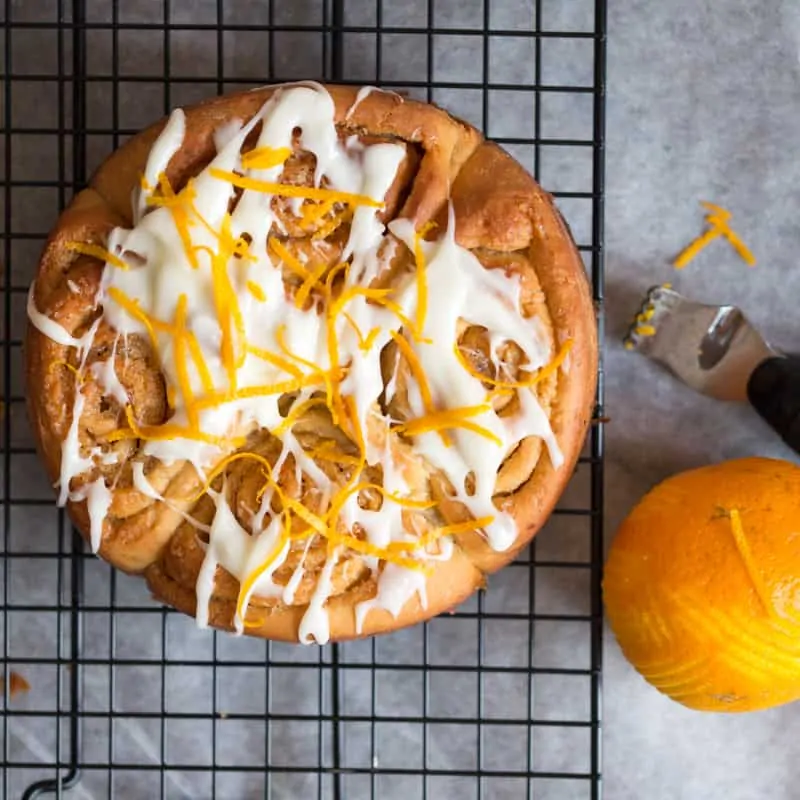
The buns are soft, fluffy, with a lovely hint of orange that’s carried right through to the sticky frosting drizzled on top.
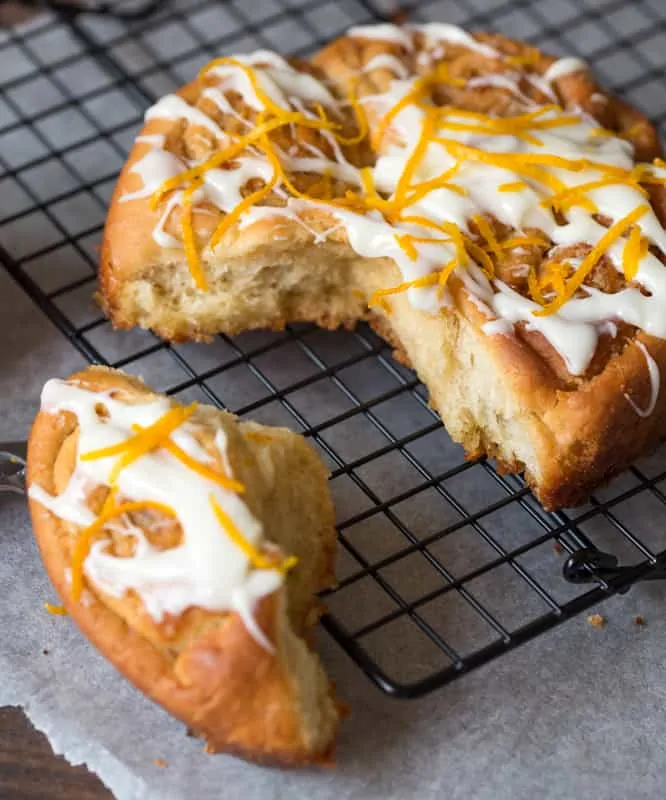
I decided to make 4 of the regular buns and about 26 of the smaller bun pops. I got the recipe for the sweet dough based on a delicious blueberry sweet roll recipe from Sallysbakingaddiction.com.
Frosted Orange Buns (makes 10-12 regular buns OR 4 regular buns and 25-30 ‘pop’ size):
Ingredients:
Buns:
- 350g plain flour (plus extra for kneading)
- 45g granulated sugar
- 1 teaspoon salt
- 12g instant dried yeast
- 120ml water
- 60ml whole milk
- 40g unsalted butter
- 1 large egg
Filling:
- 60g unsalted butter, very soft but not melted
- 150g golden granulated sugar
- Zest of 1 and a half large oranges
- ½ tsp vanilla extract
Orange Frosting:
- 150g cream cheese (room temperature)
- 160g icing/confectioners’ sugar
- juice of 1 large orange
- Zest of half an orange (to sprinkle on at the end)
Method:
- For the buns: In a large bowl add the flour and sugar, then on one side of the bowl add the salt, and add the yeast to the other side (yeast doesn’t like direct contact with salt). Set aside.
- In a jug, add the water, milk and butter, and heat in the microwave until the butter has melted and the liquid is hot, but not so hot it would burn you. Add the liquid to the flour mixture, then give it a stir with a wooden spoon and add in the egg. Give it all a good mix with your hands and then tip out onto a lightly floured surface and knead for about 4 or 5 minutes. It will be sticky, but try not to add more flour as it will make the buns tougher. Gather the dough into a ball and place in a bowl that’s been lightly greased with olive or vegetable oil. Cover with clingfilm and leave for 10 minutes.
- Make the filling: mix all of the filling ingredients together in a bowl. It will look like damp lumpy sugar.
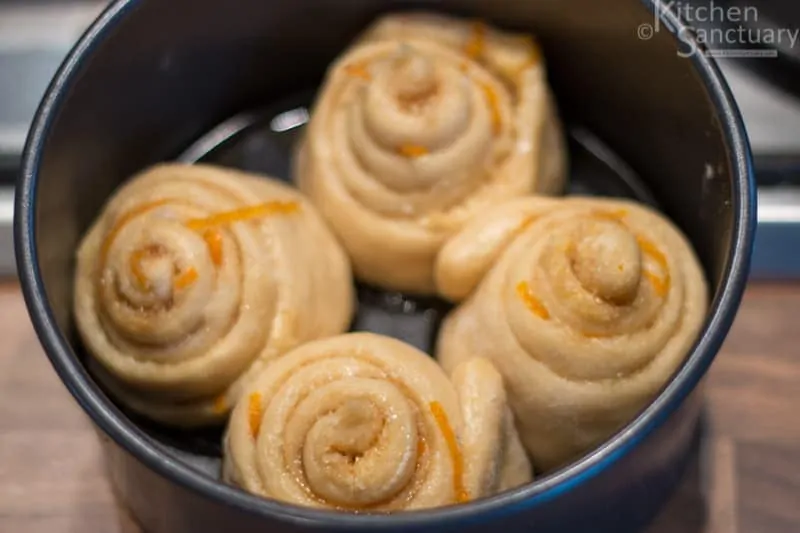
- Roll out the dough on a floured surface until it’s about 30cmx30cm/12×12 inches. Spread the filling over all of the dough – right up to the edges. Cut 4 long strips, each 2.5x30cm/1×12 inches and roll up fairly tightly. This will make your 4 regular size buns. Place them on a small baking tray or in a loose bottomed cake tin so that the buns are not quite touching (they’ll expand as they rise).
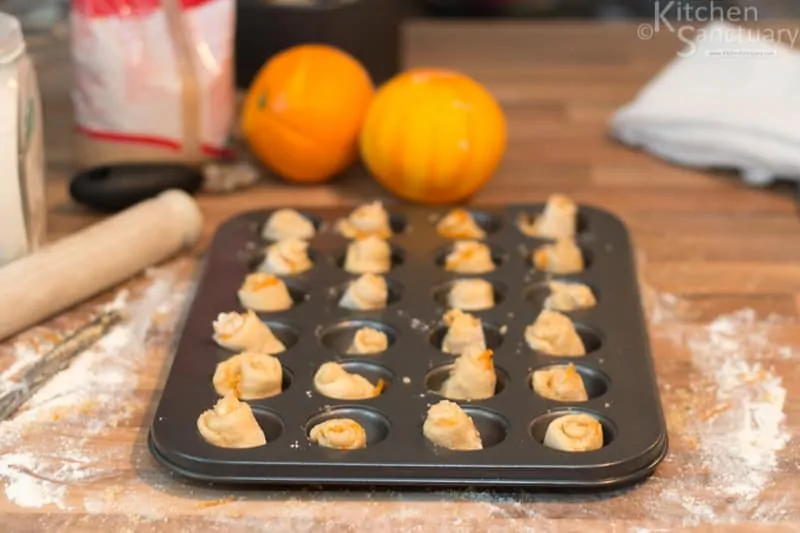
- For the remaining dough, cut into strips that are approx 1.5x15cm/0.6x6inches and roll them up fairly tightly. Place them on a flat tray or a fairy cake tin. The sizes of the strips don’t have to be exact, but you’re basically cutting your dough like this:


** Some people roll the dough into a sausage first, then cut into pieces, but I found this squashes the dough.
- Place the trays in a large carrier bag and leave to prove in a warm draft free room for about 60-90 minutes.
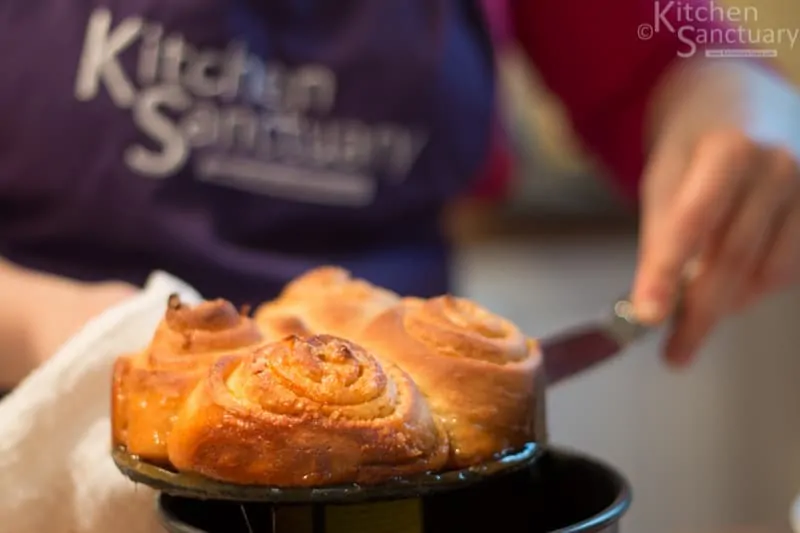
- Pre-heat oven to 190C. Take the trays out of the bags (they should have almost doubled in size during this time, and will be seeping a bit of liquid from the orange/sugar filling) and place in the oven to cook for 25 mins for the regular buns and 20 mins for the bun pops. It’s worth covering the buns with a bit of tin foil after 10 mins so they don’t burn.
 |
 |
- Whilst they’re in the oven, make the frosting. Mix the cream cheese in a bowl until it’s loosened up a bit, then mix in the icing sugar until there are no lumps and finally add the orange juice. Give it a good mix until smooth. You want a frosting that is thick, but still just pouring consistency, so you may need to add a little more juice/water or icing sugar until you find the right consistency. You can mix using a hand whisk or an electric mixer.
- Once the buns are cooked, take them out of the oven and put on a plate fairly quickly. There will probably be some liquid sugar underneath, so you need to take the buns of the trays before they stick.

- Leave to cool a little, then drizzle on the frosting and sprinkle with the remaining orange zest. The bun pops can be served as they are or on little cocktail sticks. The cocktail sticks are easy to stick in whilst the pops are warm.
*** Tip*** These buns don’t keep very long – 2 or 3 days in a tightly sealed container, but can be revived with a 10 second stint in the microwave. It’s highly unlikely they’ll be around that long though!!